Diffuse

Diffuse determines the color of a material when it is hit by light.
The diffuse panel contains all the tools to better edit the diffuse, and get the preferred material.

The first icon open the Textures manager menu for diffuse.
Textures manager – Diffuse
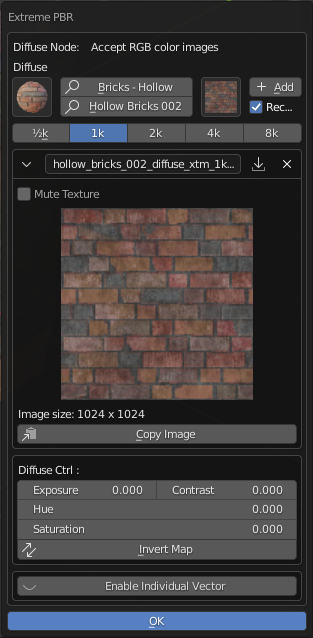
The Textures manager panel contains a set of tools to speed up the manipulation of material images.
Textures manager – Preview Icon

This icon opens a sub-menu, where all the materials in the chosen category are displayed.
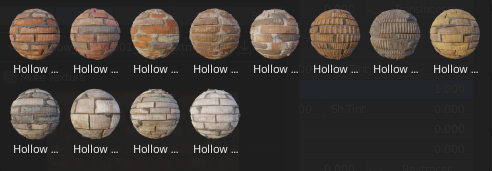
Search Category Material

The first search box allows you to change the type of material.

Click on the field to activate the search panel.
Type the name of the category you want to search, or select the category from the category list.
Search Name Material

The second search box allows you to search by material name.
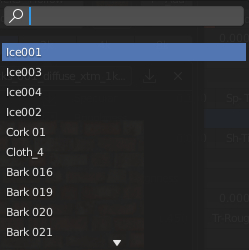
Click on the field to activate the search name panel.
Type the name of the material you want to search, or select the material from the name list.
Textures list

Use this icon, to change the image to be used as a spread, by selecting the new image from the list of available images.

The proposed images are those found in the chosen material.
Add textures

Use this icon to replace the previous image for the diffuse, with the selected image.
Recycled if exist

Use existing image if it exists. Useful for not reloading the same image several times.
Select resolution

choose the resolution of the textures to download.
Mute textures
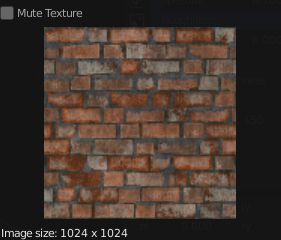
Use this option to turn the selected textures on or off. This panel provides information about the resolution of the selected textures.
Copy image

Copy image, useful for pasting it into another map.
Diffuse Control
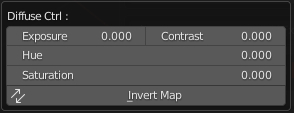
This panel provides a number of useful settings for quickly manipulating textures.
Exposure
Used to control the image brightness (in stops) applied before color space conversion
Contrast
A scaling type factor by which to make brighter pixels brighter, but keeping the darker pixels dark. Higher values make details stand out. Use a negative number to decrease the overall contrast in the image
Hue
The Hue Saturation Value applies a color transformation in the HSV color space
Saturation
A saturation of 0 removes hues from the image, resulting in a grayscale image. A shift greater than 1.0 increases saturation.
Invert
Use this button to invert the colors of the texture
Enable individual vector
Enables location, rotation, and scale settings individually on these textures.
Color Lab button

use this button if you want to select a specific color by activating the panel of the Color Lab System
Color Lab panel
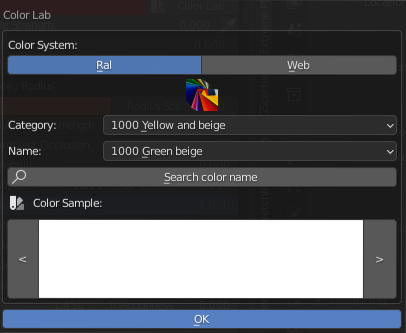
Clicking on the corresponding button will open the Color lab panel.
Where it will be possible to select colors using universal color coding systems (for more information: https://www.colorcodeslab.com/en/)
RAL color

The first option is to choose RAL coding (https://www.colorcodeslab.com/en/ral-color/)
WEB color

The second color coding is the classic WEB
Once the color coding mode has been selected, it is possible to filter the relative category and consequently choose the name using the relative fields.

The last field allows for a preview of the selected color and a small navigation between colors.

Once selected the color will be assigned as a color to the object.
Colorize strenght
Through this field you can mix the main color with the previously chosen textures.

Emission
The Emission is used to add Lambertian emission shader.


The icon next to the emission field allows you to select a texture to be used as a parameter for texture emission. (See the Diffuse panel for description)
Transparent

The Transparent value is used to add transparency without refraction, passing straight through the surface, as if there were no geometry there. Useful with alpha maps, for example. This shader affects light paths somewhat differently than other BSDFs. Note that only pure white transparent shaders are completely transparent.
This value can range from 0 to 1 where 0 is opaque and 1 is completely transparent.
Alpha mode

To the right of the Transparent field is this button. Click on the button to cycle through the relative Alpha modes.
Alpha texture

Use this button to the left of the Transparent field to activate the textures panel.
That way it will be possibile to assign a textures value to create the best transparency.
Texture panel
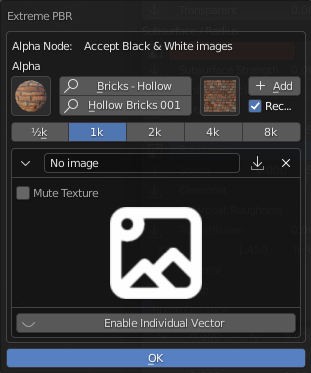
Alpha textures

This icon opens a sub-menu, where all the materials in the chosen category are displayed.

Search Category Material

The first search box allows you to change the type of material.

Click on the field to activate the search panel.
Type the name of the category you want to search, or select the category from the category list.
Search Name Material

The second search box allows you to search by material name.

Click on the field to activate the search name panel.
Type the name of the material you want to search, or select the material from the name list.
Textures list

Use this icon, to change the image to be used as a spread, by selecting the new image from the list of available images.

The proposed images are those found in the chosen material.
Add textures

Use this icon to replace the previous image for the diffuse, with the selected image.
Recycled if exist

Use existing image if it exists. Useful for not reloading the same image several times.
Select resolution

choose the resolution of the textures to download.
Mute textures

Use this option to turn the selected textures on or off. This panel provides information about the resolution of the selected textures.
Copy image

Copy image, useful for pasting it into another map.
Alpha control – Invert map

Use this button to invert the colors of the texture
From min

this value determines the beginning of the gradient value to be used for the transparency
From max

this value determines the end of the gradient value to be used for the transparency
Non-color

Non-color, exactly simulates the color space of the texture image. This is to prevent some images with different color spaces from being replaced and confused. The color space will be simulated automatically. With this criterion: Non-Color image, the button will switch to standard mode. sRGB image or other types, the button will simulate Non-Color
Enable individual vector
Enables location, rotation, and scale settings individually on these textures.
Subsurface / Radius

The Subsurface Scattering is used to add simple subsurface multiple scattering, for materials such as skin, wax, marble, milk and others. For these materials, rather than light being reflect directly off the surface, it will penetrate the surface and bounce around internally before getting absorbed or leaving the surface at a nearby point.
The subsurface panel contains all the tools to better edit the subsurface, and get the preferred material.

The first icon open the Textures manager menu for diffuse.
Textures manager – Subsurface
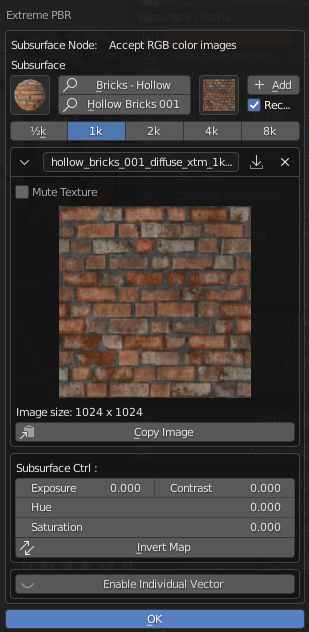
The Textures manager panel contains a set of tools to speed up the manipulation of material images.
Textures manager – Preview Icon

This icon opens a sub-menu, where all the materials in the chosen category are displayed.

Search Category Material

The first search box allows you to change the type of material.

Click on the field to activate the search panel.
Type the name of the category you want to search, or select the category from the category list.
Search Name Material

The second search box allows you to search by material name.

Click on the field to activate the search name panel.
Type the name of the material you want to search, or select the material from the name list.
Textures list

Use this icon, to change the image to be used as a spread, by selecting the new image from the list of available images.

The proposed images are those found in the chosen material.
Add textures

Use this icon to replace the previous image for the diffuse, with the selected image.
Recycled if exist

Use existing image if it exists. Useful for not reloading the same image several times.
Select resolution

choose the resolution of the textures to download.
Mute textures

Use this option to turn the selected textures on or off. This panel provides information about the resolution of the selected textures.
Copy image

Copy image, useful for pasting it into another map.
Subsurface Control
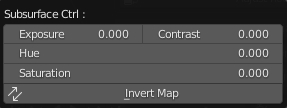
This panel provides a number of useful settings for quickly manipulating textures.
Exposure
Used to control the image brightness (in stops) applied before color space conversion
Contrast
A scaling type factor by which to make brighter pixels brighter, but keeping the darker pixels dark. Higher values make details stand out. Use a negative number to decrease the overall contrast in the image
Hue
The Hue Saturation Value applies a color transformation in the HSV color space
Saturation
A saturation of 0 removes hues from the image, resulting in a grayscale image. A shift greater than 1.0 increases saturation.
Invert
Use this button to invert the colors of the texture
Enable individual vector
Enables location, rotation, and scale settings individually on these textures.
Subsurface strenght

Through this field you can mix the main color with the previously chosen textures.
Translucency
Activate or deactivate the Subsurface translucency, only in EEvEE
Ambient Occlusion

Ambient Occlusion is a sophisticated ray-tracing calculation which simulates soft global illumination shadows by faking darkness perceived in corners and at mesh intersections, creases, and cracks, where ambient light is occluded, or blocked.

The first icon open the Textures manager menu for ambient occlusion.
Textures manager – Ambient occlusion
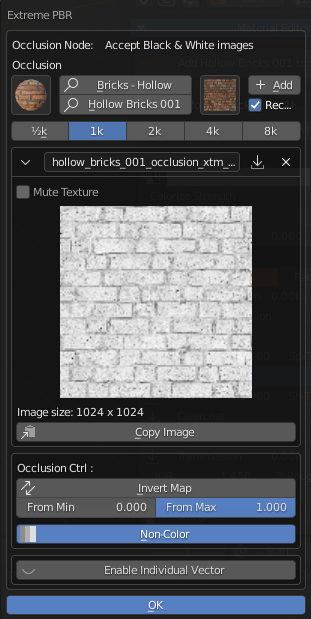
The Textures manager panel contains a set of tools to speed up the manipulation of material images.
Textures manager – Preview Icon

This icon opens a sub-menu, where all the materials in the chosen category are displayed.

Search Category Material

The first search box allows you to change the type of material.

Click on the field to activate the search panel.
Type the name of the category you want to search, or select the category from the category list.
Search Name Material

The second search box allows you to search by material name.

Click on the field to activate the search name panel.
Type the name of the material you want to search, or select the material from the name list.
Textures list

Use this icon, to change the image to be used as a spread, by selecting the new image from the list of available images.

The proposed images are those found in the chosen material.
Add textures

Use this icon to replace the previous image for the diffuse, with the selected image.
Recycled if exist

Use existing image if it exists. Useful for not reloading the same image several times.
Select resolution

choose the resolution of the textures to download.
Mute textures

Use this option to turn the selected textures on or off. This panel provides information about the resolution of the selected textures.
Copy image

Copy image, useful for pasting it into another map.
Ambient occlusion Control

This panel provides a number of useful settings for quickly manipulating textures.
Exposure
Used to control the image brightness (in stops) applied before color space conversion
Contrast
A scaling type factor by which to make brighter pixels brighter, but keeping the darker pixels dark. Higher values make details stand out. Use a negative number to decrease the overall contrast in the image
Hue
The Hue Saturation Value applies a color transformation in the HSV color space
Saturation
A saturation of 0 removes hues from the image, resulting in a grayscale image. A shift greater than 1.0 increases saturation.
Invert
Use this button to invert the colors of the texture
Enable individual vector
Enables location, rotation, and scale settings individually on these textures.
Ambient occlusion
Through this field you can mix the main color with the previously chosen textures.
Metallic

Blends between a non-metallic and metallic material model. A value of 1.0 gives a fully specular reflection tinted with the base color, without diffuse reflection or transmission. At 0.0 the material consists of a diffuse or transmissive base layer, with a specular reflection layer on top.

The first icon open the Textures manager menu for metallic.
Textures manager – Metallic
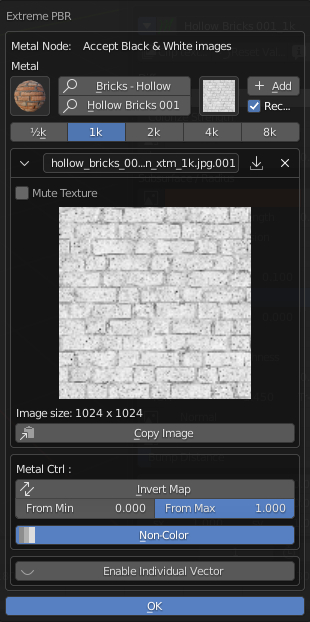
The Textures manager panel contains a set of tools to speed up the manipulation of material images.
Textures manager – Preview Icon

This icon opens a sub-menu, where all the materials in the chosen category are displayed.

Search Category Material

The first search box allows you to change the type of material.

Click on the field to activate the search panel.
Type the name of the category you want to search, or select the category from the category list.
Search Name Material

The second search box allows you to search by material name.

Click on the field to activate the search name panel.
Type the name of the material you want to search, or select the material from the name list.
Textures list

Use this icon, to change the image to be used as a spread, by selecting the new image from the list of available images.

The proposed images are those found in the chosen material.
Add textures

Use this icon to replace the previous image for the diffuse, with the selected image.
Recycled if exist

Use existing image if it exists. Useful for not reloading the same image several times.
Select resolution

choose the resolution of the textures to download.
Mute textures

Use this option to turn the selected textures on or off. This panel provides information about the resolution of the selected textures.
Copy image

Copy image, useful for pasting it into another map.
Metallic Control

This panel provides a number of useful settings for quickly manipulating textures.
Exposure
Used to control the image brightness (in stops) applied before color space conversion
Contrast
A scaling type factor by which to make brighter pixels brighter, but keeping the darker pixels dark. Higher values make details stand out. Use a negative number to decrease the overall contrast in the image
Hue
The Hue Saturation Value applies a color transformation in the HSV color space
Saturation
A saturation of 0 removes hues from the image, resulting in a grayscale image. A shift greater than 1.0 increases saturation.
Invert
Use this button to invert the colors of the texture
Enable individual vector
Enables location, rotation, and scale settings individually on these textures.
Specular

The specular workflow functions by specifying the facing (along normal) reflection color. The result may not be physically plausible because there is no energy conservation.

The first icon open the Textures manager menu for specular.
Textures manager – Specular
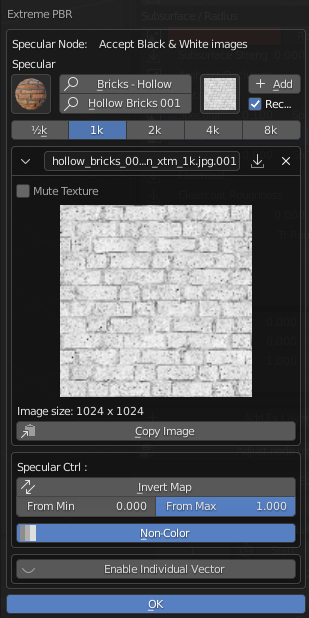
The Textures manager panel contains a set of tools to speed up the manipulation of material images.
Textures manager – Preview Icon

This icon opens a sub-menu, where all the materials in the chosen category are displayed.

Search Category Material

The first search box allows you to change the type of material.

Click on the field to activate the search panel.
Type the name of the category you want to search, or select the category from the category list.
Search Name Material

The second search box allows you to search by material name.

Click on the field to activate the search name panel.
Type the name of the material you want to search, or select the material from the name list.
Textures list

Use this icon, to change the image to be used as a spread, by selecting the new image from the list of available images.

The proposed images are those found in the chosen material.
Add textures

Use this icon to replace the previous image for the diffuse, with the selected image.
Recycled if exist

Use existing image if it exists. Useful for not reloading the same image several times.
Select resolution

choose the resolution of the textures to download.
Mute textures

Use this option to turn the selected textures on or off. This panel provides information about the resolution of the selected textures.
Copy image

Copy image, useful for pasting it into another map.
Specular Control

This panel provides a number of useful settings for quickly manipulating textures.
Invert
Use this button to invert the colors of the texture
From min

this value determines the beginning of the gradient value to be used for the transparency
From max

this value determines the end of the gradient value to be used for the transparency
Non-color

Non-color, exactly simulates the color space of the texture image. This is to prevent some images with different color spaces from being replaced and confused. The color space will be simulated automatically. With this criterion: Non-Color image, the button will switch to standard mode. sRGB image or other types, the button will simulate Non-Color
Enable individual vector
Enables location, rotation, and scale settings individually on these textures.
Roughness

Specifies microfacet roughness of the surface for diffuse and specular reflection

The first icon open the Textures manager menu for roughness.
Textures manager – Diffuse
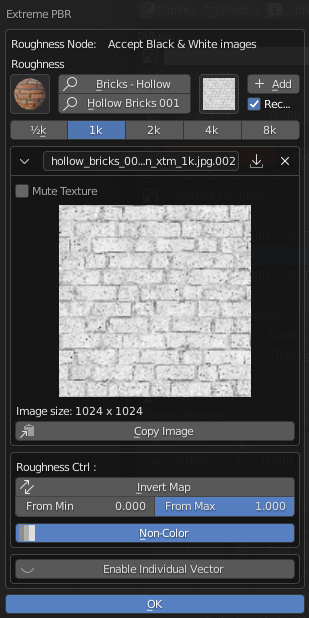
The Textures manager panel contains a set of tools to speed up the manipulation of material images.
Textures manager – Preview Icon

This icon opens a sub-menu, where all the materials in the chosen category are displayed.

Search Category Material

The first search box allows you to change the type of material.

Click on the field to activate the search panel.
Type the name of the category you want to search, or select the category from the category list.
Search Name Material

The second search box allows you to search by material name.

Click on the field to activate the search name panel.
Type the name of the material you want to search, or select the material from the name list.
Textures list

Use this icon, to change the image to be used as a spread, by selecting the new image from the list of available images.

The proposed images are those found in the chosen material.
Add textures

Use this icon to replace the previous image for the diffuse, with the selected image.
Recycled if exist

Use existing image if it exists. Useful for not reloading the same image several times.
Select resolution

choose the resolution of the textures to download.
Mute textures

Use this option to turn the selected textures on or off. This panel provides information about the resolution of the selected textures.
Copy image

Copy image, useful for pasting it into another map.
Roughness Control

This panel provides a number of useful settings for quickly manipulating textures.
Invert
Use this button to invert the colors of the texture
From min

this value determines the beginning of the gradient value to be used for the transparency
From max

this value determines the end of the gradient value to be used for the transparency
Non-color

Non-color, exactly simulates the color space of the texture image. This is to prevent some images with different color spaces from being replaced and confused. The color space will be simulated automatically. With this criterion: Non-Color image, the button will switch to standard mode. sRGB image or other types, the button will simulate Non-Color
Enable individual vector
Enables location, rotation, and scale settings individually on these textures.
Sheen

Amount of soft velvet like reflection near edges, for simulating materials such as cloth..

The first icon open the Textures manager menu for Sheen.
Textures manager – Sheen
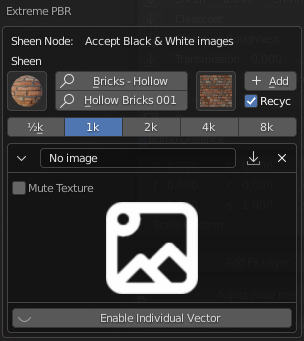
The Textures manager panel contains a set of tools to speed up the manipulation of material images.
Textures manager – Preview Icon

This icon opens a sub-menu, where all the materials in the chosen category are displayed.

Search Category Material

The first search box allows you to change the type of material.

Click on the field to activate the search panel.
Type the name of the category you want to search, or select the category from the category list.
Search Name Material

The second search box allows you to search by material name.

Click on the field to activate the search name panel.
Type the name of the material you want to search, or select the material from the name list.
Textures list

Use this icon, to change the image to be used as a spread, by selecting the new image from the list of available images.

The proposed images are those found in the chosen material.
Add textures

Use this icon to replace the previous image for the diffuse, with the selected image.
Recycled if exist

Use existing image if it exists. Useful for not reloading the same image several times.
Select resolution

choose the resolution of the textures to download.
Mute textures

Use this option to turn the selected textures on or off. This panel provides information about the resolution of the selected textures.
Copy image

Copy image, useful for pasting it into another map.
Sheen Control

This panel provides a number of useful settings for quickly manipulating textures.
Invert
Use this button to invert the colors of the texture
From min

this value determines the beginning of the gradient value to be used for the transparency
From max

this value determines the end of the gradient value to be used for the transparency
Non-color

Non-color, exactly simulates the color space of the texture image. This is to prevent some images with different color spaces from being replaced and confused. The color space will be simulated automatically. With this criterion: Non-Color image, the button will switch to standard mode. sRGB image or other types, the button will simulate Non-Color
Enable individual vector
Enables location, rotation, and scale settings individually on these textures.
Sheen Tint
Mix between white and using base color for sheen reflection.
Clearcoat

Extra white specular layer on top of others. This is useful for materials like car paint and the like

The first icon open the Textures manager menu for ClearCoat.
Textures manager – Clearcoat
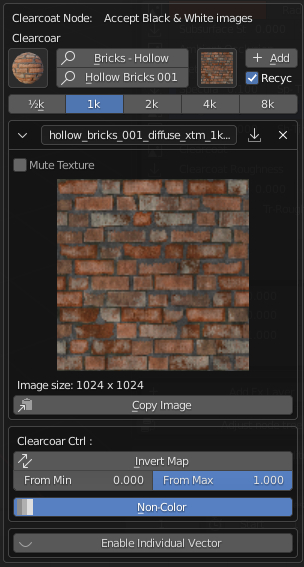
The Textures manager panel contains a set of tools to speed up the manipulation of material images.
Textures manager – Preview Icon

This icon opens a sub-menu, where all the materials in the chosen category are displayed.

Search Category Material

The first search box allows you to change the type of material.

Click on the field to activate the search panel.
Type the name of the category you want to search, or select the category from the category list.
Search Name Material

The second search box allows you to search by material name.

Click on the field to activate the search name panel.
Type the name of the material you want to search, or select the material from the name list.
Textures list

Use this icon, to change the image to be used as a spread, by selecting the new image from the list of available images.

The proposed images are those found in the chosen material.
Add textures

Use this icon to replace the previous image for the diffuse, with the selected image.
Recycled if exist

Use existing image if it exists. Useful for not reloading the same image several times.
Select resolution

choose the resolution of the textures to download.
Mute textures

Use this option to turn the selected textures on or off. This panel provides information about the resolution of the selected textures.
Copy image

Copy image, useful for pasting it into another map.
Clearcoat Control

This panel provides a number of useful settings for quickly manipulating textures.
Invert
Use this button to invert the colors of the texture
From min

this value determines the beginning of the gradient value to be used for the transparency
From max

this value determines the end of the gradient value to be used for the transparency
Non-color

Non-color, exactly simulates the color space of the texture image. This is to prevent some images with different color spaces from being replaced and confused. The color space will be simulated automatically. With this criterion: Non-Color image, the button will switch to standard mode. sRGB image or other types, the button will simulate Non-Color
Enable individual vector
Enables location, rotation, and scale settings individually on these textures.
Clearcoat Tint
Mix between white and using base color for sheen reflection.
Clearcoat roughness

Extra white specular layer on top of others. This is useful for materials like car paint and the like

The first icon open the Textures manager menu for ClearCoat.
Textures manager – Clearcoat
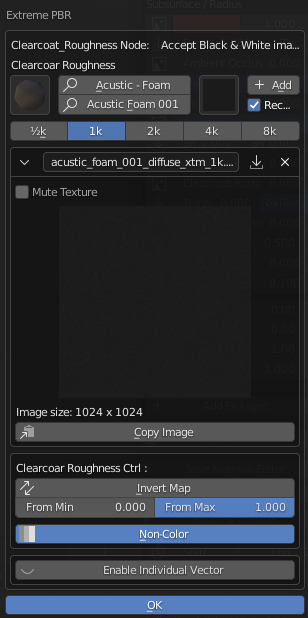
The Textures manager panel contains a set of tools to speed up the manipulation of material images.
Textures manager – Preview Icon

This icon opens a sub-menu, where all the materials in the chosen category are displayed.

Search Category Material

The first search box allows you to change the type of material.

Click on the field to activate the search panel.
Type the name of the category you want to search, or select the category from the category list.
Search Name Material

The second search box allows you to search by material name.

Click on the field to activate the search name panel.
Type the name of the material you want to search, or select the material from the name list.
Textures list

Use this icon, to change the image to be used as a spread, by selecting the new image from the list of available images.

The proposed images are those found in the chosen material.
Add textures

Use this icon to replace the previous image for the diffuse, with the selected image.
Recycled if exist

Use existing image if it exists. Useful for not reloading the same image several times.
Select resolution

choose the resolution of the textures to download.
Mute textures
Use this option to turn the selected textures on or off. This panel provides information about the resolution of the selected textures.
Copy image

Copy image, useful for pasting it into another map.
Clearcoat Control
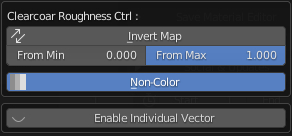
This panel provides a number of useful settings for quickly manipulating textures.
Invert
Use this button to invert the colors of the texture
From min

this value determines the beginning of the gradient value to be used for the transparency
From max

this value determines the end of the gradient value to be used for the transparency
Non-color

Non-color, exactly simulates the color space of the texture image. This is to prevent some images with different color spaces from being replaced and confused. The color space will be simulated automatically. With this criterion: Non-Color image, the button will switch to standard mode. sRGB image or other types, the button will simulate Non-Color
Enable individual vector
Enables location, rotation, and scale settings individually on these textures
Transmission

Mix between fully opaque surface at zero and fully glass like transmission at one

The first icon open the Textures manager menu for ClearCoat.
Textures manager – Clearcoat
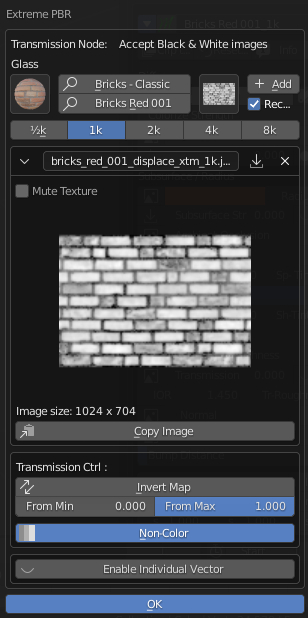
The Textures manager panel contains a set of tools to speed up the manipulation of material images.
Textures manager – Preview Icon

This icon opens a sub-menu, where all the materials in the chosen category are displayed.

Search Category Material

The first search box allows you to change the type of material.

Click on the field to activate the search panel.
Type the name of the category you want to search, or select the category from the category list.
Search Name Material

The second search box allows you to search by material name.

Click on the field to activate the search name panel.
Type the name of the material you want to search, or select the material from the name list.
Textures list

Use this icon, to change the image to be used as a spread, by selecting the new image from the list of available images.

The proposed images are those found in the chosen material.
Add textures

Use this icon to replace the previous image for the diffuse, with the selected image.
Recycled if exist

Use existing image if it exists. Useful for not reloading the same image several times.
Select resolution

choose the resolution of the textures to download.
Mute textures
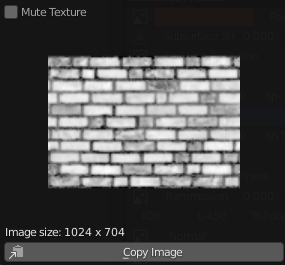
Use this option to turn the selected textures on or off. This panel provides information about the resolution of the selected textures.
Copy image

Copy image, useful for pasting it into another map.
Clearcoat Control

This panel provides a number of useful settings for quickly manipulating textures.
Invert
Use this button to invert the colors of the texture
From min

this value determines the beginning of the gradient value to be used for the transparency
From max

this value determines the end of the gradient value to be used for the transparency
Non-color

Non-color, exactly simulates the color space of the texture image. This is to prevent some images with different color spaces from being replaced and confused. The color space will be simulated automatically. With this criterion: Non-Color image, the button will switch to standard mode. sRGB image or other types, the button will simulate Non-Color
Enable individual vector
Enables location, rotation, and scale settings individually on these textures
Raytracer

Activate or deactivate, the Screen Space Refraction (for the glass). Eevee Only, in Cycles, thi is not necessary.
IOR

Index of refraction for transmission.
Transmission Roughness (Cycles Only)

With GGX distribution controls roughness used for transmitted light.
Normal

Normal mapping, or Dot3 bump mapping, is a texture mapping technique used for faking the lighting of bumps and dents – an implementation of bump mapping

The first icon open the Textures manager menu for Normal.
Textures manager – Normal
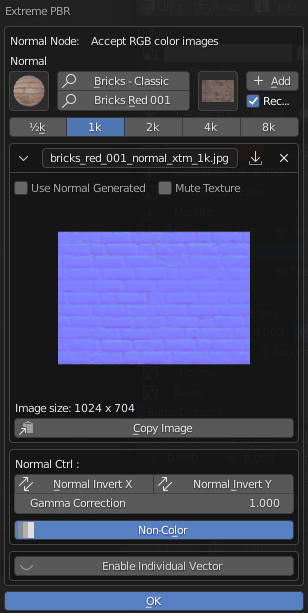
The Textures manager panel contains a set of tools to speed up the manipulation of material images.
Textures manager – Preview Icon

This icon opens a sub-menu, where all the materials in the chosen category are displayed.

Search Category Material

The first search box allows you to change the type of material.

Click on the field to activate the search panel.
Type the name of the category you want to search, or select the category from the category list.
Search Name Material

The second search box allows you to search by material name.

Click on the field to activate the search name panel.
Type the name of the material you want to search, or select the material from the name list.
Textures list

Use this icon, to change the image to be used as a spread, by selecting the new image from the list of available images.

The proposed images are those found in the chosen material.
Add textures

Use this icon to replace the previous image for the diffuse, with the selected image.
Recycled if exist

Use existing image if it exists. Useful for not reloading the same image several times.
Select resolution

choose the resolution of the textures to download.
Mute textures
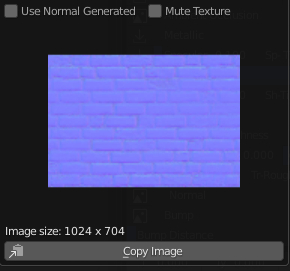
Use this option to turn the selected textures on or off. This panel provides information about the resolution of the selected textures.
Copy image

Copy image, useful for pasting it into another map.
Roughness Control

This panel provides a number of useful settings for quickly manipulating textures.
Invert
Use this button to invert the colors of the texture
From min

this value determines the beginning of the gradient value to be used for the transparency
From max

this value determines the end of the gradient value to be used for the transparency
Non-color

Non-color, exactly simulates the color space of the texture image. This is to prevent some images with different color spaces from being replaced and confused. The color space will be simulated automatically. With this criterion: Non-Color image, the button will switch to standard mode. sRGB image or other types, the button will simulate Non-Color
Enable individual vector
Enables location, rotation, and scale settings individually on these textures.
Bump

Bump mapping is a texture mapping technique in computer graphics for simulating bumps and wrinkles on the surface of an object

The first icon open the Textures manager menu for Bump Map.
Textures manager – Bump
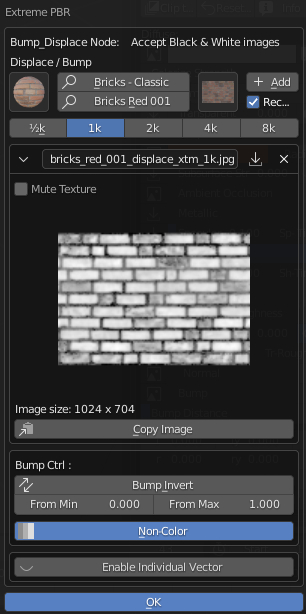
The Textures manager panel contains a set of tools to speed up the manipulation of material images.
Textures manager – Preview Icon

This icon opens a sub-menu, where all the materials in the chosen category are displayed.

Search Category Material

The first search box allows you to change the type of material.

Click on the field to activate the search panel.
Type the name of the category you want to search, or select the category from the category list.
Search Name Material

The second search box allows you to search by material name.

Click on the field to activate the search name panel.
Type the name of the material you want to search, or select the material from the name list.
Textures list

Use this icon, to change the image to be used as a spread, by selecting the new image from the list of available images.

The proposed images are those found in the chosen material.
Add textures

Use this icon to replace the previous image for the diffuse, with the selected image.
Recycled if exist

Use existing image if it exists. Useful for not reloading the same image several times.
Select resolution

choose the resolution of the textures to download.
Mute textures
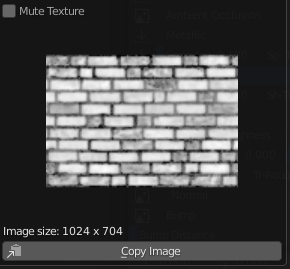
Use this option to turn the selected textures on or off. This panel provides information about the resolution of the selected textures.
Copy image

Copy image, useful for pasting it into another map.
Roughness Control

This panel provides a number of useful settings for quickly manipulating textures.
Invert
Use this button to invert the colors of the texture
From min

this value determines the beginning of the gradient value to be used for the transparency
From max

this value determines the end of the gradient value to be used for the transparency
Non-color

Non-color, exactly simulates the color space of the texture image. This is to prevent some images with different color spaces from being replaced and confused. The color space will be simulated automatically. With this criterion: Non-Color image, the button will switch to standard mode. sRGB image or other types, the button will simulate Non-Color
Enable individual vector
Enables location, rotation, and scale settings individually on these textures.
Bump Distance

The Bump Distance value controls the height of the Bump.
