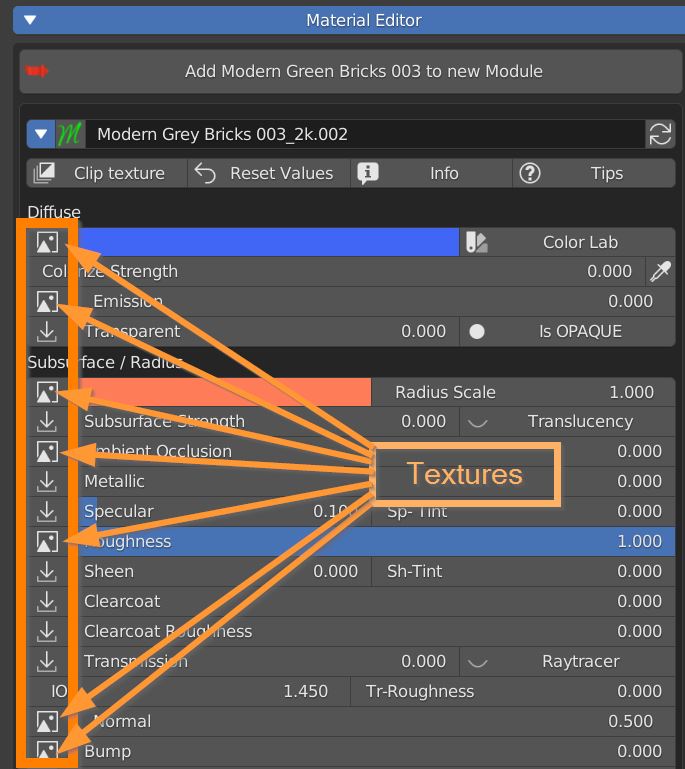
Every time an image icon is next to a slider, it means that there is a texture feeding that input.Click on the icon to open the Texture Manager panel.
Here you can individually manipulate every texture of the material.
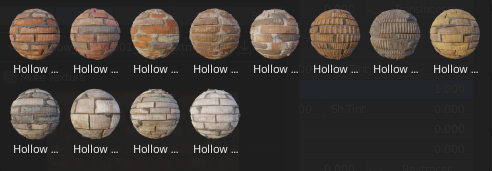
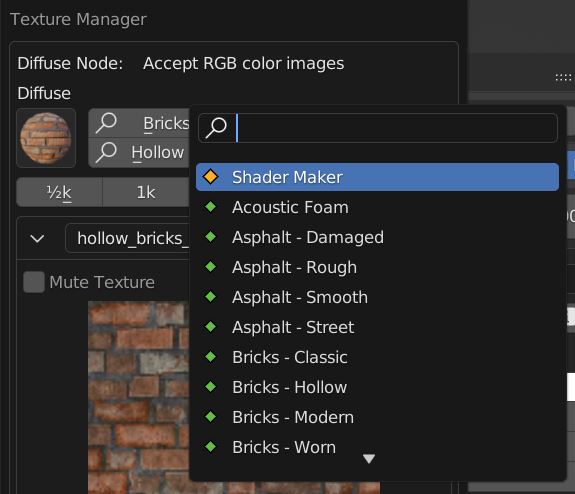
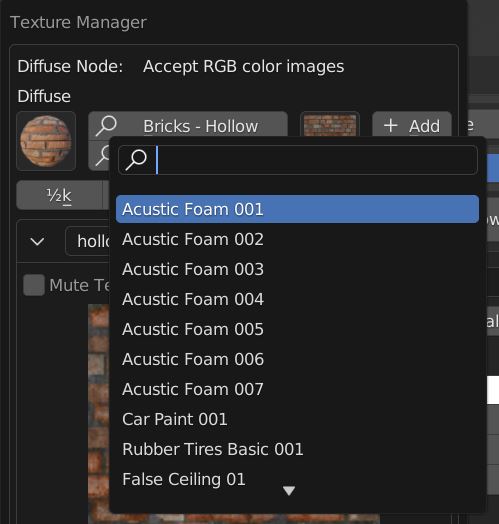
The header contains a library browser, where you can select a category, a material from a list, a material by thumbnails and a texture between thoose of the selected material.
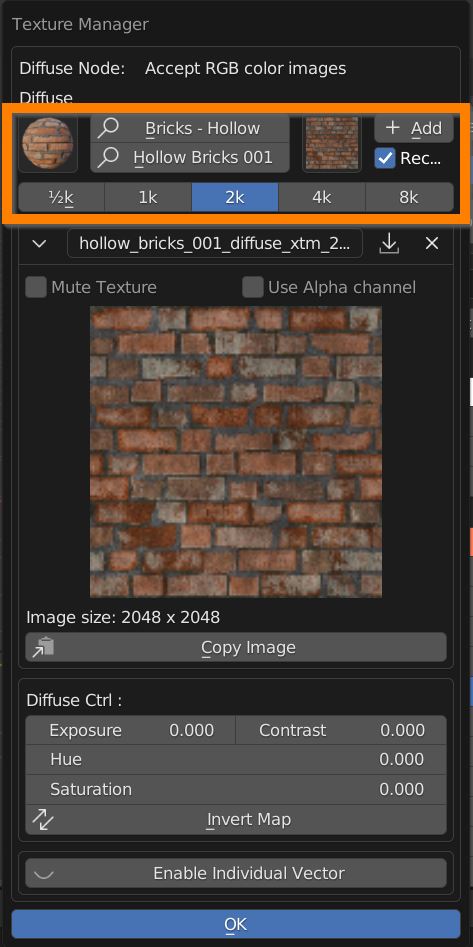
Once an image texture is selected, choose its desired resolution and click on the Add button to replace the image in the slot.
A ticked Rec preference ensures that if a texture is already present it doesn’t get loaded twice.

Click on the dropdown menu button to browse the already loaded textures in the project file.
Click on the file browser arrow to load a new texture from your computer.
The X button disconnect the texture from the slot.
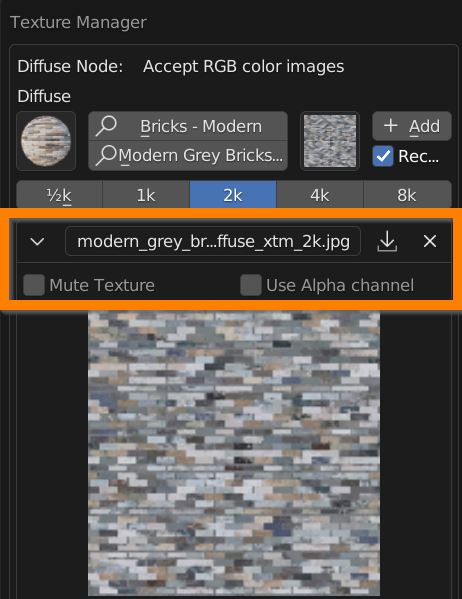
You can Mute the influence of the texture without deleting its connection.
You can use the Alpha channel instead of RGB channels to control the parameter.
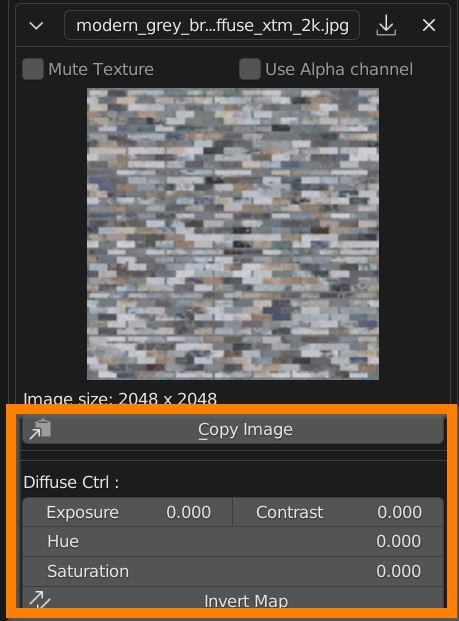
Click on Copy Image button to copy the texture in the clipboard, and paste it into another parameter slot.
You can adjust Exposure, Contrast, Hue and Saturation of an RGB image, and Invert its values with the Invert Map button.
If you click on the Enable Individual Vector, you can adjust Location, Rotation and Scale of the Image independently from the others textures of the material.
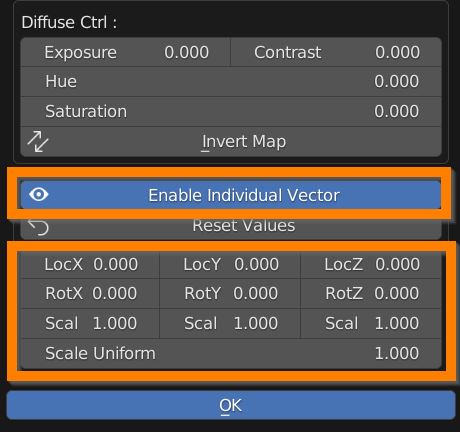
Press OK to confirm the edits.
If the texture manager is called for a single property, a Black and White image is expected, where Black means a value of 0.0, White 1.0, Mid Grey 0.5 and so on.
Non-Color button ensures a linear interpolation between shades of grey and values, if the image has color informations, its color space is turned into “Non-Color” and pixel values are taken into account.
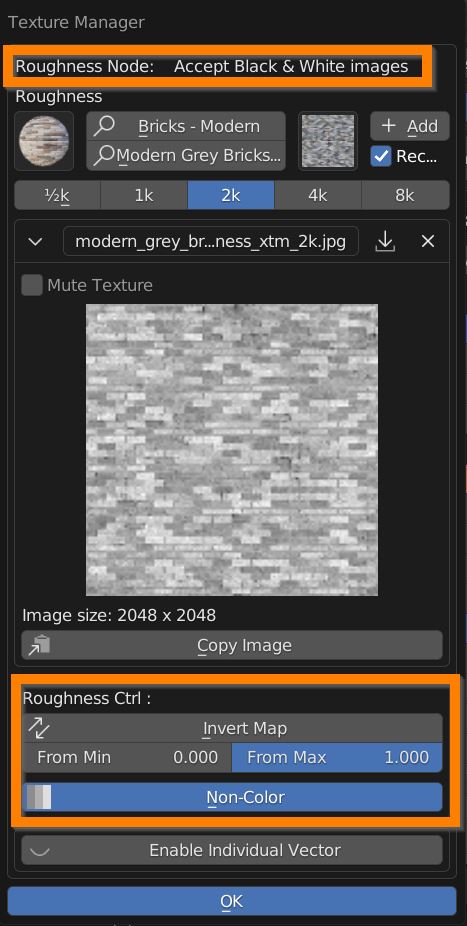
From Min slider crunches Blacks toward Whites.
From Max slider crunches Whites toward Blacks.
In case of Normal Map Texture Manager, you can tick the Use Normal Generated button to derive a normal map from a diffuse or bump texture.
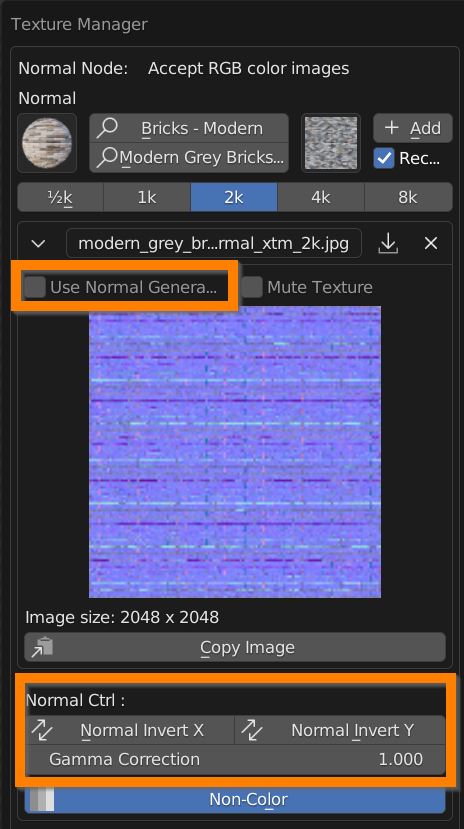
You can Invert X and Y direction and apply a Gamma correction on the Map, to ensure compatibility with different standard generated images.