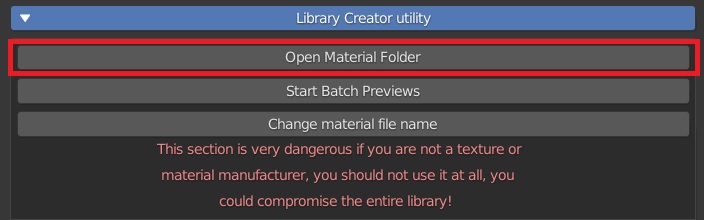
Open Material Folder opens the folder that contains the material that is active in the Manager Interface, that is the material of the preview of the main panel of Extreme PBR
Warning, do not use this tool on the Extreme PBR native library, you could damage the library irreparably!
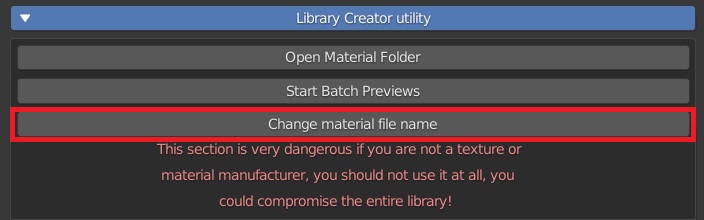
This instrument is very delicate and must be fully learned as regards its real function. It was really used to facilitate the actual creation of Extreme PBR Preview, we felt it appropriate to leave this tool for use by the end user as well, especially for creators of materials and new libraries.
Basically it serves to replace the preview of the library.
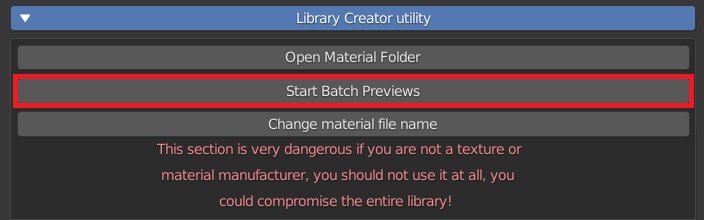
When we at Extreme Addons created the previews of the library, at the beginning we had some white “Fake” previews, from then on we did a “Start batch previews” and we created the current previews present in the main Extreme PBR library. The previews can be rewritten if, for example, the quality level does not meet your needs.
Start Batch Previews popup panel:
Object Type: Enum in [‘Sphere’, ‘Plane’] Decide which type of preview to use, the “Plane” is useful for materials with Alpha Channel.
Rot X, Rot Y: The rotation of the preview object
Exclude Reflections: Excludes reflection to the material in the preview
Use auto Size: Automatically positions the camera if activating the displace, it goes beyond the limits of the camera.
Only Current Material: If Active Create the preview only on the material that has been selected from the library from the preview of the main panel of Extreme PBR
From Cat / To Cat: It decides from which category to which category to execute the Batch Render of the previews. To start from the first Category set “0” in “From Cat”, while in “To Cat” it is the numerical limit of the list of categories. Note that the list starts at 0, so the first category in your library will be number 0.
Use Shade Smooth: If active Using interpolated vertex normals, the mesh faces will blur at the edges and appear smooth.
Use Auto Smooth: If active the edges where an angle between the faces is smaller than specified in the Angle field will be smoothed, when shading of these parts of the mesh is set to smooth. This is an easier way to combine smooth and sharp edges.
Angle: The angle of the Auto Smooth
Use displace if Exist: If active and if there is a displace map in the material, it can be displayed in the preview.
Max Subdivision: Subdivision of the object of the preview, the higher it is and the more the displacement will be aesthetically better. The rendering time is affected a lot, the higher it is the more time it takes to render. Leave at 0 To have a displacement with a render in the shortest possible time.
Displace Strength: Adjust the amount of displacement
Smooth Factor: Smooths sharp edges derived from displacement
Smooth Iterations: The number of smoothing iterations, equivalent to executing the Smooth tool multiple times.
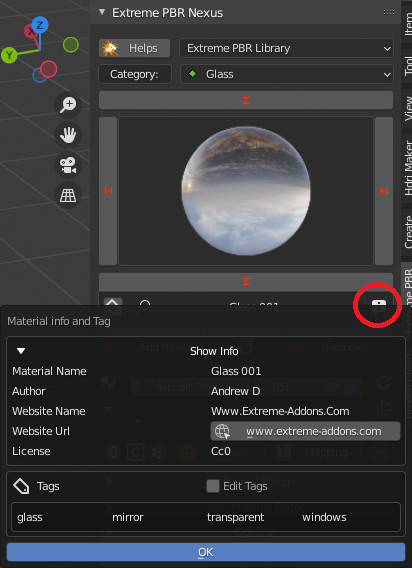
Create the json file needed to show the “Material info” in the Extreme PBR main panel of the single and current material in the preview. Display the menu
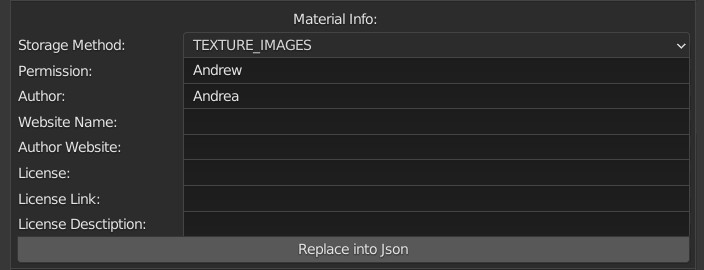
These fields to be filled in are used to show the following properties in the Extreme PBR panel once registered:
Storage method: (This is essential to make Extreme PBR recognize what type of material it is, consequently facilitating the import into the normal workflow of the end user.)
TEXTURE_IMAGE: If your material is full Texture based (Like Extreme PBR texture library)
SAVE_MODULE: If you have built your own procedural module, then not a texture type.
SAVE_MATERIAL: If you want to save the entire material (Not recommended)
Permission: This is a kind of password to avoid damaging your library by the end user. For example our library has a special permission, which can be easily traced, but the basic task is not to allow the end user to damage the libraries by mistake. For example, if you enter the name “Your name” as permission, to further modify this json file, you will need to remember the previous name “Your name” to be able to modify it. (The json file is in the material folder in case you forgot “Your name”)
Author: If you want you can enter your name, or that of your company, it will be shown as in the example of the image above.
Website Name: If you have a site or something like that, even a social media page, you should enter its name here.
Author Website: Here if you want you can enter the exact url to the Web page that you want to show the end user, then as in the upper image, a button will appear, clicking it will take you to your chosen internet page.
License: Here you should enter what type of license to enter, this is essential for the end user, to make them understand what they can or cannot do with your materials
License Link: If you have a link to the license, here you should enter a URL, a button will be shown that once clicked will take the end user to better read the license you have decided to use.
License Description: Here if you want you can enter a brief description of what it can do and what it cannot do, so that the end user is clear about what he can and what he cannot do with this material.
Replace into Json: This button will only replace the information entered in the fields above, it will leave the rest of the json file unchanged.
Important licensing note! Pay close attention to the license you have chosen to use, we invite you not to violate the laws and possibly inform yourself on these useful links in order to deepen these types of licenses: https://creativecommons.org/share-your-work/
Warning, do not use in the Extreme PBR library, use only for creating new libraries!
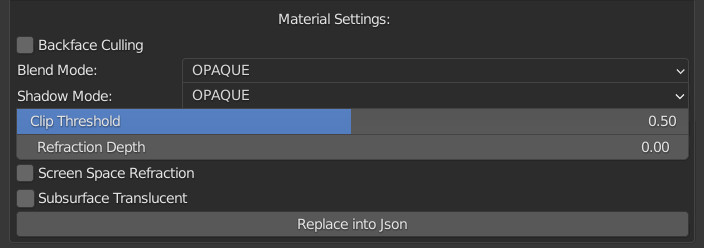
This menu is used to enter the properties of the material to be saved, these items will be stored in the json mat_info.json file, this allows you to automatically set those properties when the user adds to the scene, it will be set with these properties
Backface Culling: Use backface culling to hide backsides of faces.
Blend Mode:
Opaque: The previous color will be overwritten by the surface color. The alpha component is ignored. This is the fastest option.
Alpha Clip: The previous color will be overwritten by the surface color, but only if the alpha value is above the clip threshold.
Alpha Hashed: The previous color will be overwritten by the surface color, but only if the alpha value is above a random clip threshold. This statistical approach is noisy but is able to approximate alpha blending without any sorting problem. Increasing the sample count in the render settings will reduce the resulting noise.
Alpha Blending: Use alpha blending to overlay the surface color on top of the previous color.
Shadow Mode:
None: The surface will not cast any shadow.
Opaque: The surface will cast shadows like an opaque surface.
Clip: The surface will cast shadows like an opaque surface, but only areas where the alpha value is above the clip threshold.
Hashed: The surface will cast shadows like an opaque surface, but only areas where the alpha value is above a random threshold.
Clip Threshold: A pixel is rendered only if its alphavalue is above this threshold
Screen Space Refraction: Use raytraced screen space refraction.
Subsurface Translucent: If active Subsurface traslucent will be stored in the material
Replace into Json: You will only be able to replace these properties if you don’t want to change the whole mat_info.json file
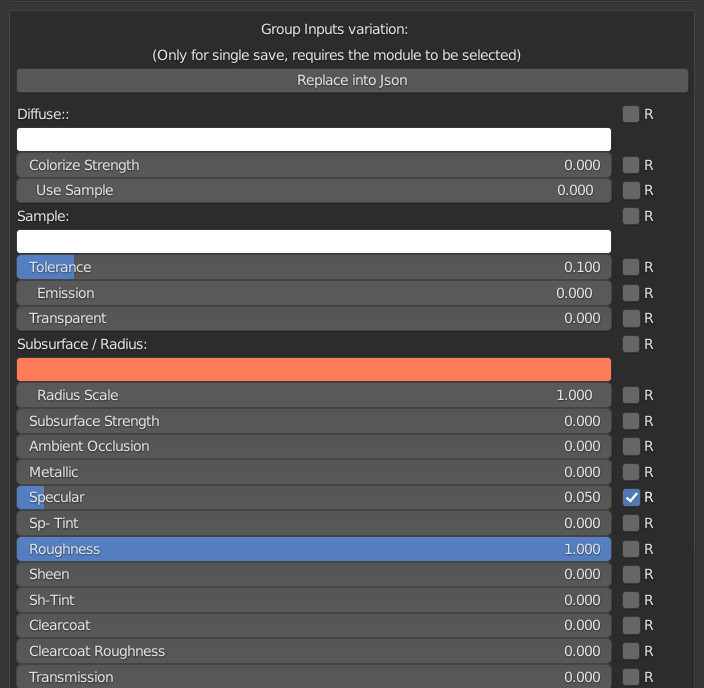
This menu is used to save the material properties.
Example:
You want the Metallic material you created with the textures to be set with a Specular of 0.05, just check the box next to the Roughness set to your liking and press the Replace into json button.
Note: To show this Menu, you must be in the Main Node Tree of an Extreme PBR material, you must have selected 1 Module / Fx, to view the properties to be stored.