12.0 Save Material Editor – Panel

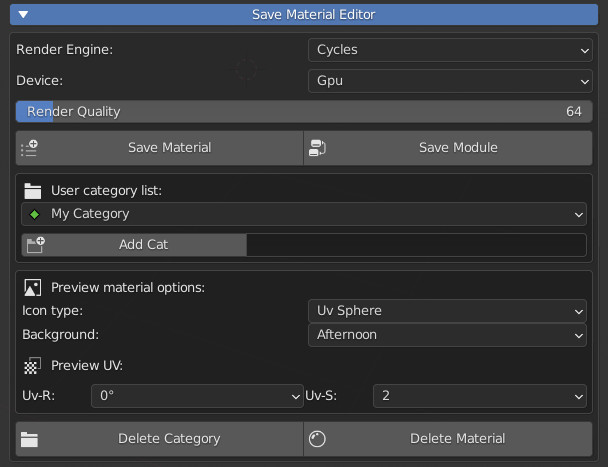
This panel is dedicated to save your materials in a “User Library”, you can create your own libraries with your categories.

  • Render Engine: Choose the engine to render the preview of the material to be saved
  • Device: Choose to render with CPU or GPU
  • Render Quality: Set the render quality, the higher the more it will take time
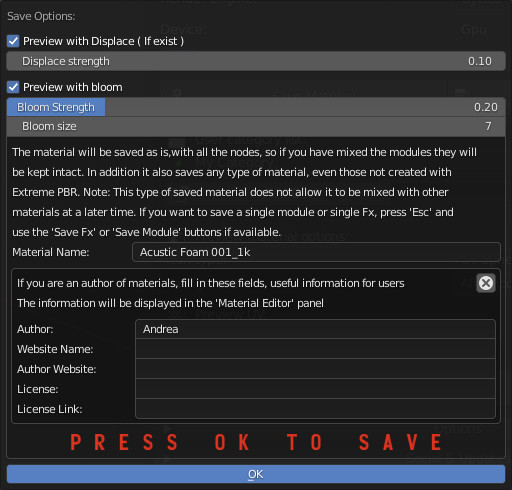
  • Save Material: Save the entire material, including all nodes.
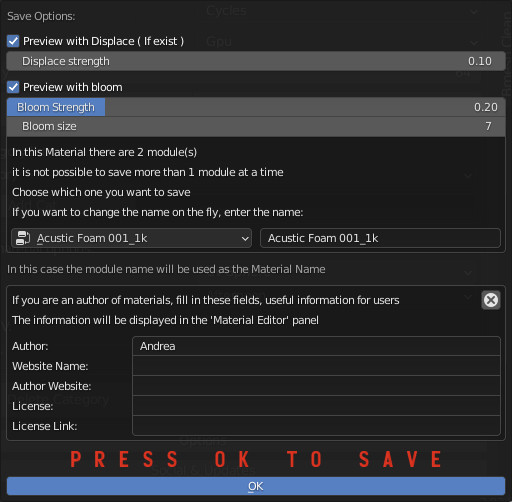
  • Save Module: Save only the selected “Module” (The saved Modules will be indicated in the preview with a small spherical icon at the bottom right)
  • User Category List: Choose the User category, where to save the material.
  • Add Cat: Add a new category (Fill in the field on the right first with the name of the category you want to create)
  • Icon Type: Choose what type of object to render the material on, it will become a preview icon.
  • Background: Choose the type of Background to render, it will not be visible, but different lights will be projected, based on HDR maps
  • Uv-R: Choose the UV Rotation on the render icon object
  • Uv-S: Choose the UV Scale on the render icon object
  • Delete Category: Delete the category and all the materials contained in it.
  • Delete Material: Delete only the current User Library Material.

12.1 Save Material Editor – Save Material

  • Preview With Displace: If it exists, use displacement on the preview object.
    • Displace Strength: Displace Strength on the preview object.
  • Preview With Bloom: Adds a Bloom (Compositing) effect to the render of the icon
    • Bloom Strength: Set the bloom strength on the preview icon
    • Bloom Size: Set bloom size on the preview icon
  • Material Name: Here you can enter the name of the material on the fly (By default it is the exact one itself)
  • Material Info: Here if you want you can enter your data
    • Author: You can enter your name
    • Website Name: You can enter your website name
    • Author Website: If you fill in this field with a valid URL, a button will be shown on “Material Info” with a button that will send to your site / social
    • License: Here you should enter the license type if you want to sell or distribute your materials. The end user will want to know under what license the material.
    • License Link: If you want to use Creative Commons, knowing the license type link is always useful.

12.2 Save Material Editor – Save Module

  • Preview With Displace: If it exists, use displacement on the preview object.
    • Displace Strength: Displace Strength on the preview object.
  • Preview With Bloom: Adds a Bloom (Compositing) effect to the render of the icon
    • Bloom Strength: Set the bloom strength on the preview icon
    • Bloom Size: Set bloom size on the preview icon
  • Module List:
  • Module Name: Here you can enter the name of the material on the fly (By default it is the exact one itself)
  • Material Info: Here if you want you can enter your data
    • Author: You can enter your name
    • Website Name: You can enter your website name
    • Author Website: If you fill in this field with a valid URL, a button will be shown on “Material Info” with a button that will send to your site / social
    • License: Here you should enter the license type if you want to sell or distribute your materials. The end user will want to know under what license the material.
    • License Link: If you want to use Creative Commons, knowing the license type link is always useful.