Shader Overlay (Currently experimental)
It is used to add to all the materials of the selected objects, a small group node (Identical for all materials) manageable from the “Shader Overlay” menu
The idea is to manage the overlap of the material through a Mix node that acts as a gradient.
Note:
This technique is very expensive in terms of resources, it is advisable to apply to as few models as possible (Especially for the amount of different materials you want to apply it to) in order to manage it more easily
Shader Overlay Menu Example:
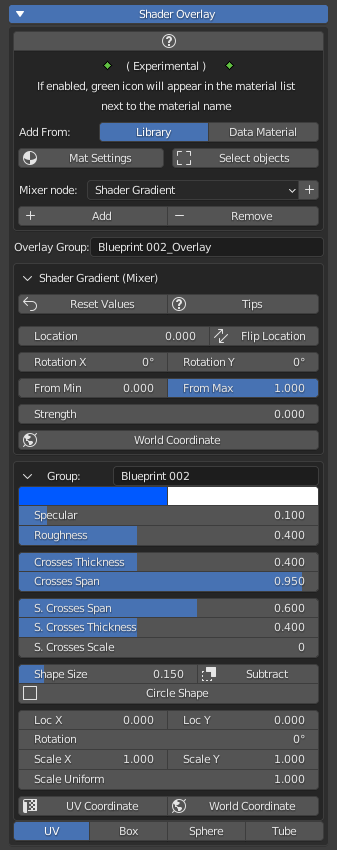
Quick look at the functions:
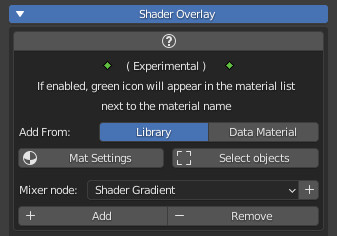
- Add From:
Library: To add material from the Extreme PBR library
Data Material: To add the material from the material list present in the current Blender project
- Mat Settings (Popup Menu):
Useful in Eevee render engine to set the same material properties in one go, on all materials that have the Shader Overlay inside
You will need to check the properties you want to modify, modify them, and press the Ok button:
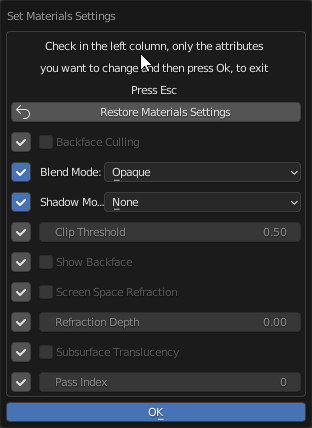
- Select Objects:
By pressing this button, it will select all objects containing the same Shader Overlay group. This makes it very easy to eventually delete shader overlays, which is useful as you can apply different Shader Overlays in your project - Mixer Node:
Choose the type of Mixer you want to use from the list. It is simply the group node that will be used to blend your base material with the shader overlay. - Add:
Adds/Replaces the shader overlay to all selected objects, according to the “Add From” chosen - Remove:
Removes the shader overlay to all selected objects.
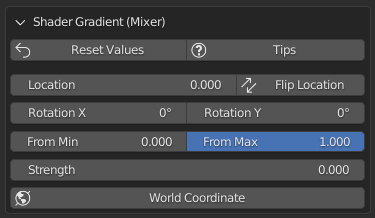
Shader Gradient (Mixer)
This is the Mixer for adjusting the mixing between the Base material and that of the shader overlay:
Press the Tips button to show all function explanations:
