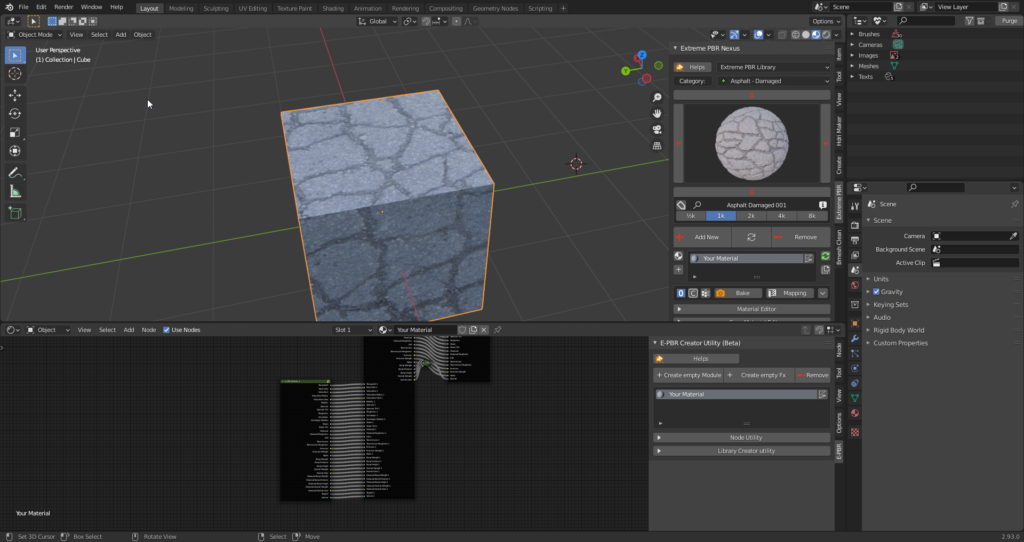
Creator Utility is a useful tool included in Extreme PBR, this serves to facilitate the production of Materials to be added to a new custom library. For material producers (especially procedural materials) we believe this tool is indispensable to increase the speed of the workflow and the understanding of the Extreme PBR system.
Attention, you should use this section only if you are interested in creating Materials to sell, or to create your own personal library. It is not recommended for use by end users, as it may damage the Extreme PBR Base library
To display this menu in the node “Shader Editor” window GoTo: ExtrmePBR Options–>Show Creator Utility
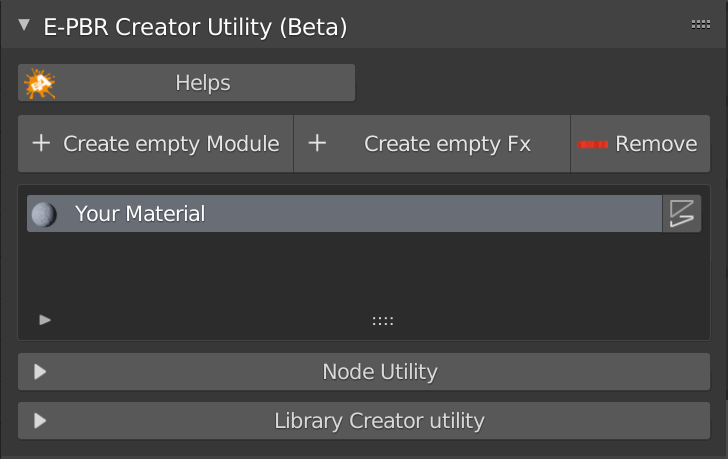
This section is to facilitate the creation of a custom library of Extreme PBR, you can also sell this package as an additional library for Extreme PBR.
This Operator creates a material with a Basic module of Extreme PBR inside from which you can start working on your material. This is done to facilitate the work of creating your library to be published.
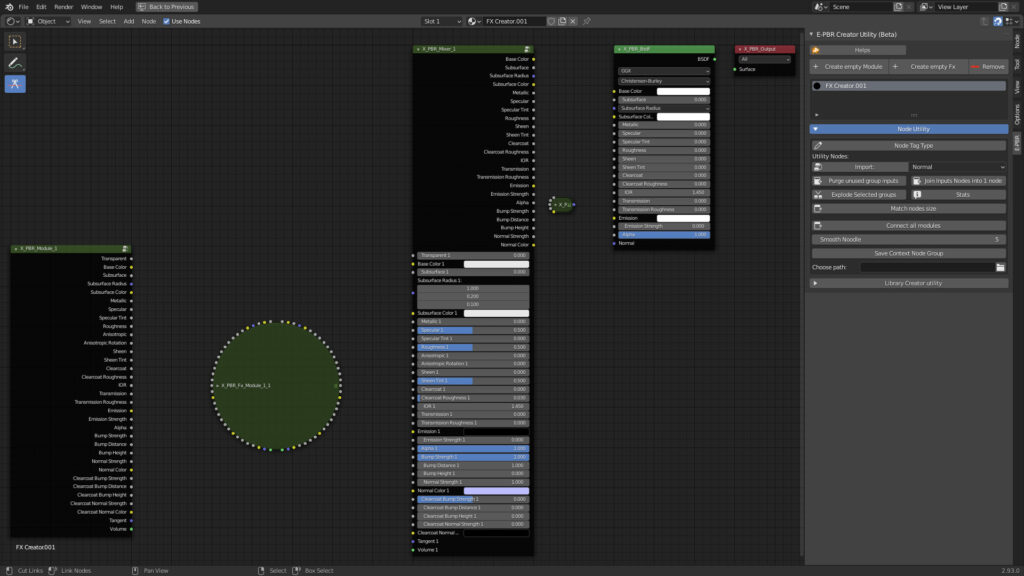
Once you have added an “Empty Module”, in the Shader Editor, you will have a standard Extreme PBR module available to work on.
This Operator creates a material with a Basic FX Module of Extreme PBR inside from which you can start working on your material. This is done to facilitate the work of creating your library to be published.
Once you have added an “Empty Fx”, in the Shader Editor, you will have a standard Extreme PBR module available to work on.
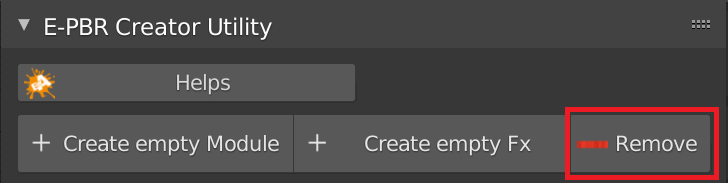
This button, is the equivalent of the one present in the main interface of Extreme PBR, is used to remove the active material, that is the one currently selected in the material list.
Being inside an active material created with Extreme PBR.
Be inside an Extreme PBR Module, or FX Module.
Have a node selected and active.
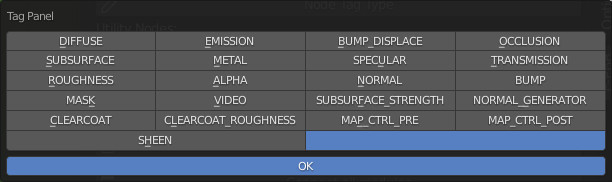
Once this button is pressed, a popup will appear:
From the Popup Panel it is possible to assign the TAG to the selected Texture Type node (Choose the tag and press OK).
Note: It is not necessary to use TAGs to create new Material Modules, but it is useful if you want to keep the operation of Essential Functions of the standard Extreme PBR Texture-based materials.
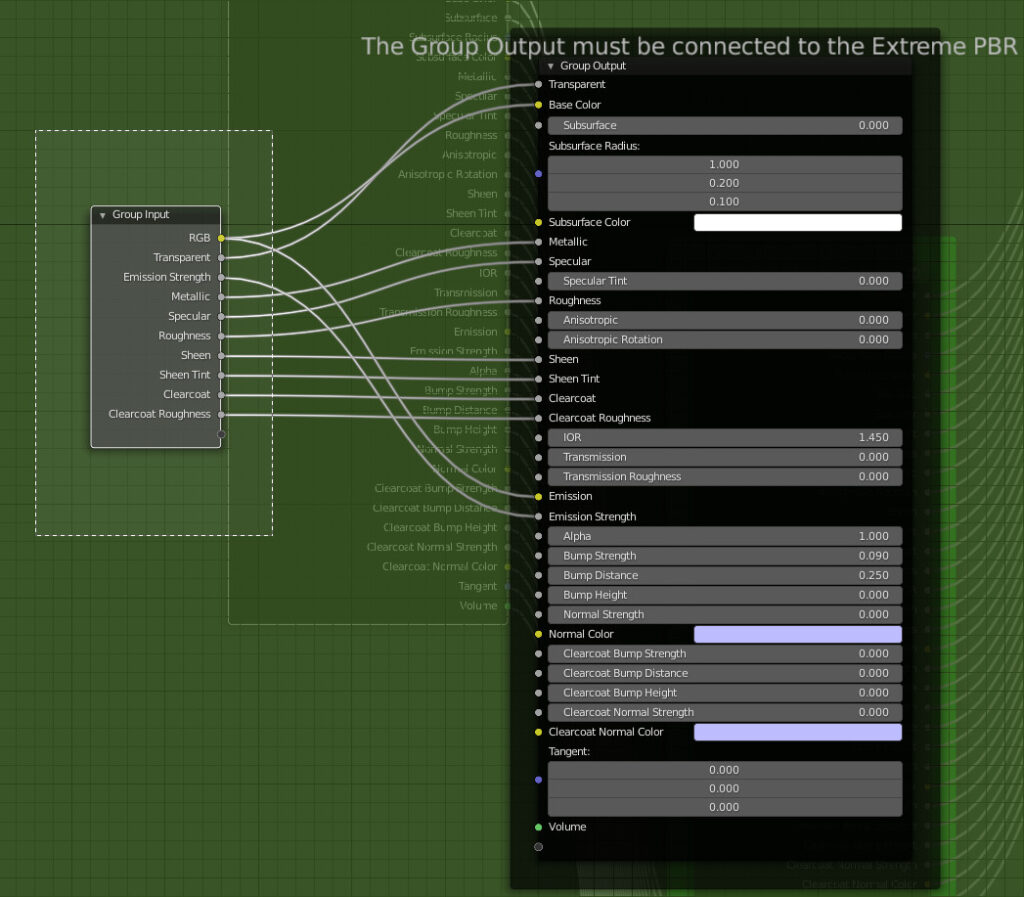
This Nodes example is a classic Texture Based Material from Extreme PBRwith related TAGs:
To Remove the TAG, press the empty button from the popup panel and Press Ok.
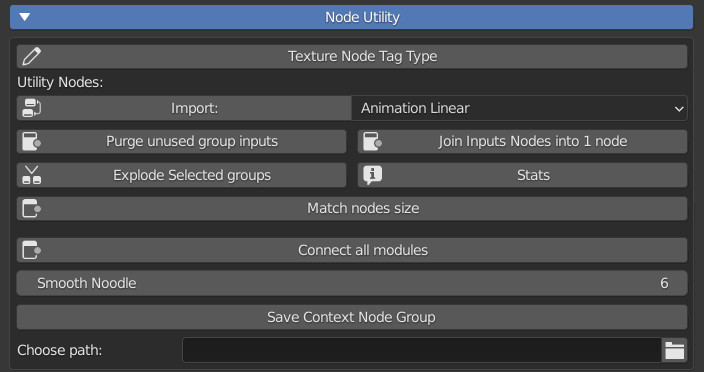
This tool is used to facilitate the creation of Modules with Extreme PBR standard group nodes. Note well, the Groups of nodes present in this small library, are the ones with which Extreme PBR was made, so you will find it useful if you are looking for some useful group nodes, for example “Linear Animation” is a nude that has an animable output, this is the most striking example.
Here are some Group Nodes ready to be imported and used:
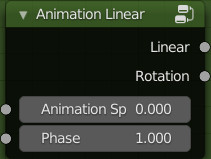
Animation Linear:
This node is pre-animated
Inputs:
Animation Speed: Adjust the speed of the animation
Phase: Move the stage of the animation, useful if you use the same node over and over again.
Outputs:
Linear: Normal Speed
Rotation: Reduced speed
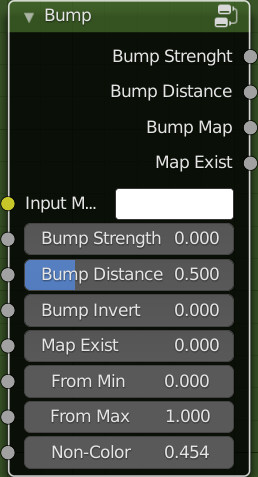
Bump:
This node group hooks perfectly to the outputs of the Extreme PBR standard modules
Inputs:
Bump Strengh: Strength of the bump mapping effect, interpolating between no bump mapping and full bump mapping.
Bump Distance: Multiplier for the height value to control the overall distance for bump mapping.
Bump Invert: Produces a negative of the input
Map Exist: This is recognized by Extreme PBR, so it will be handled automatically by it. Do not connect this input
From Min: The lower bound of the range to remap from.
From Max: The higher bound of the range to remap from.
Non-Color: Non-Color, exactly simulates the color space of the texture image. This is to prevent some images with different color spaces from being replaced and confused. The color space will be simulated automatically. With this criterion: Non-Color Image, the button will switch to standard mode. sRGB image or other types, the button will simulate Non-Color.
Outputs:
Bump Strength/Bump Distance/Bump Map/Map Exist: To be connected to the Extreme PBR module outputs, the addon takes care of the rest to connect the module to the mixer.
Map Exist: It is not necessary to use it, but if needed, it gives exactly the result 0-1 depending directly on the input of the same name
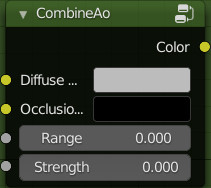
Combine AO
This group is used to blend and simulate an ambient occlusion.
Inputs:
Diffuse: This input is for the Diffuse / Albedo map
Occlusion: This input is for a pre-computed ambient occlusion map.
Range: Adjusts the range of ambient occlusion
Strength: Adjusts the intensity of the ambient occlusion map
Outputs:
Color: Result obtained
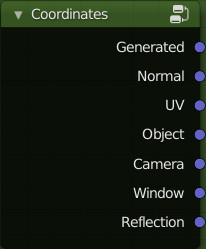
Coordinates:
This group is the exact reproduction of the Coordinates node present in Blender, but it is recognized by Extreme PBR for the Mapping Editor tool
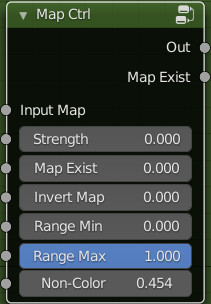
Map Ctrl:
This group is used to adjust the Black & White type map immediately after. It is recognized by Extreme PBR and provides automatisms from the Extreme PBR panel interface.
Inputs:
Input Map: Input of a grayscale map
Strength: Adjust the intensity of the map
Map Exist: This is recognized by Extreme PBR, so it will be handled automatically by it. Do not connect this input
Invert Map: Invert the map, this happens automatically via the button if this node will be tagged with the “Node Tag Type” system
Range Min: The lower bound of the range to remap from.
Range Max: The higher bound of the range to remap from.
Non-Color: Non-Color, exactly simulates the color space of the texture image. This is to prevent some images with different color spaces from being replaced and confused. The color space will be simulated automatically. With this criterion: Non-Color Image, the button will switch to standard mode. sRGB image or other types, the button will simulate Non-Color.
Outputs:
Out: Output of the result
Map Exist: It is not necessary to use it, but if needed, it gives exactly the result 0-1 depending directly on the input of the same name
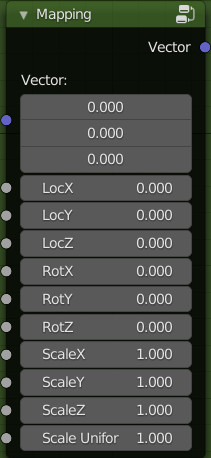
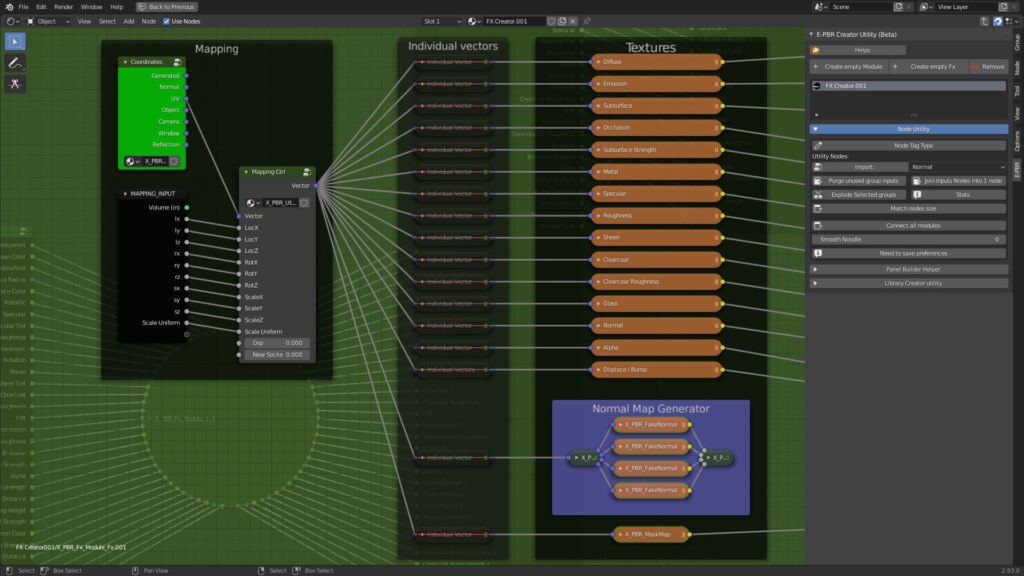
Mapping:
This group is very similar to Blender’s Standard Mapping node. With the difference that the 3 sockets of the X / Y / Z vectors have been separated, and the scale has an input to scale uniformly.
Inputs:
Vector: Coordinate input
Loc X, Y, Z: Adjust the locations
Rot X, Y, Z: Adjust the ratations
Scale X, Y, Z: Adjust the scales
Scale Uniform: Adjust the uniform scale
Outputs:
Vector: The input vector after transformation.
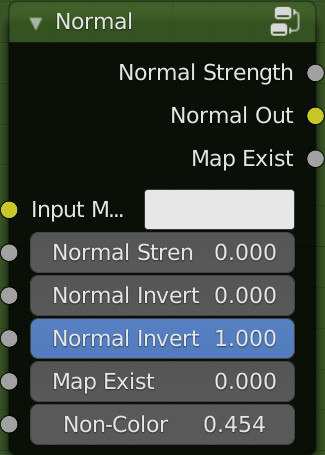
Normal:
This node connects directly to the Extreme PBR module outputs, it is used to connect the Normal maps.
Inputs:
Input Map: RGB color that encodes the normal map in the specified space.
Normal Strength: Strength of the normal mapping effect.
Normal Invert X: Invert the Red channel of the normal map
Normal Invert Y: Invert the Green channel of the normal map
Map Exist: This is recognized by Extreme PBR, so it will be handled automatically by it. Do not connect this input
Non-Color: Non-Color, exactly simulates the color space of the texture image. This is to prevent some images with different color spaces from being replaced and confused. The color space will be simulated automatically. With this criterion: Non-Color Image, the button will switch to standard mode. sRGB image or other types, the button will simulate Non-Color.
Outputs:
Normal Strength / Normal Out: Connect directly to the socket of the same name in the outputs of the Extreme PBR module
Map Exist: It is not necessary to use it, but if needed, it gives exactly the result 0-1 depending directly on the input of the same name
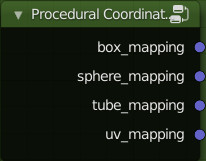
Procedural Coordinates:
This node is similar to the Coordinates node of Blender, with a big difference, it basically serves to create the Coordinates, in a procedural way, therefore very useful to use for the creation of procedural materials. This node, if used correctly, will be able to change the links dynamically with the use directly in the Extreme PBR panel of the functions present in the Mapping Editor
Outputs:
box_mapping: Produces a Box-type mapping
sphere_mapping: Produces a Sphere-type mapping
tube_mapping: Produces a Tube-type mapping
uv_mapping: Produces a UV-type mapping (Requires active UV mapping on the object)
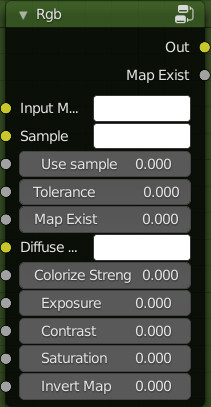
Rgb:
This Group is useful for controlling the Diffuse, some inputs are controllable through the Extreme PBR “Texture Manager” panel.
Inputs:
Input Map: Here you can connect your Diffuse surface color
Sample: This is the sample color to decide which color to “Colorize”, it works as a sampler, and makes only the chosen color be colorized. (Needs to use Colorize Strength to see a result)
Use Sample: If 0 will have no effect, if 1 Use Sample will be active, it is recommended to create a Boolean as an input.
Tollerance: Based on the adjustment, it is decided how much shade of the sampled color should be Colorized.
Map Exist: This is recognized by Extreme PBR, so it will be handled automatically by it. Do not connect this input
Diffuse Color: In this case Diffuse color, it is used for colorization, so the chosen color will be used for colorization (Use colorize strength to see the effect)
Colorize Strength: Adjust the colorization strength.
Exposure: Adjust the Exposure (Leave unplugged for use with “Texture Manager” button)
Contrast: Adjust the contrast (Leave unplugged for use with “Texture Manager” button)
Saturation: Adjust the Saturation (Leave unplugged for use with “Texture Manager” button)
Invert Map: Invert the Input Map colors (Leave unplugged for use with “Texture Manager” button)
Outputs:
Out: Result
Map Exist: It is not necessary to use it, but if needed, it gives exactly the result 0-1 depending directly on the input of the same name
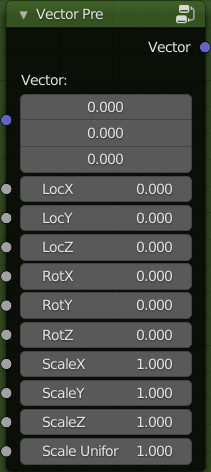
Vector Pre:
This Group is almost identical to the Mapping group, but with the difference that it can be connected directly behind a Texture Image node, making it possible through the Extreme PBR panel to show / activate / adjust the Mapping of each individual Texture Image node. Remember to Use the “Tag Node Type” on it and on the Texture Image node to make this active in the Extreme PBR panel
Inputs:
Vector: Coordinate input
Loc X, Y, Z: Adjust the locations
Rot X, Y, Z: Adjust the ratations
Scale X, Y, Z: Adjust the scales
Scale Uniform: Adjust the uniform scale
Outputs:
Vector: The input vector after transformation.
Translate / Combine Translation:
These 2 Groups are to be used in pairs to produce a simulated Normal map, it needs 4 Texture image nodes (Dupplicati linked) with the same image inside. Remember to tag the “Texture Image” node with the tag “NORMAL_GENERATOR” to make the switch between Normal & Normal Generated usable directly from the Extreme PBR panel
Connection example with 4 Texture image nodes with the same Image inside:
This Button is used to remove the socket inputs of the Extreme PBR Module that have remained not-connected within the group. On Fx type modules the input connection sockets marked with (in) will not be eliminated, as they are an integral part of the Extreme PBR system
This button is used to “Explode” the selected “node group”, it also works on multiple selections. Once the group is exploded, the nodes inside will in turn be selected, consequently if there are other subgroups of nodes, pressing several times will explode all the group nodes also inside.
Match node size button it is used to make all selected nodes the same size. Then: Select the nodes you want to resize and make the node of the desired size active, all the selected nodes will take the same size as the active node.
This button is used to connect / arrange / reposition the nodes present in the Extreme PBR Material, therefore all the modules / mixers / etc. they will be organized correctly.
It is used to smooth and round the links between nodes, this property is already present in Blender, but we have decided to make it easily accessible in this menu.
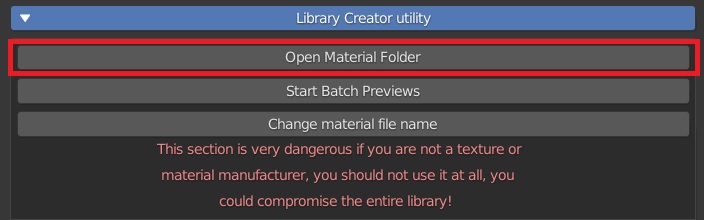
Open Material Folder opens the folder that contains the material that is active in the Manager Interface, that is the material of the preview of the main panel of Extreme PBR
Warning, do not use this tool on the Extreme PBR native library, you could damage the library irreparably!
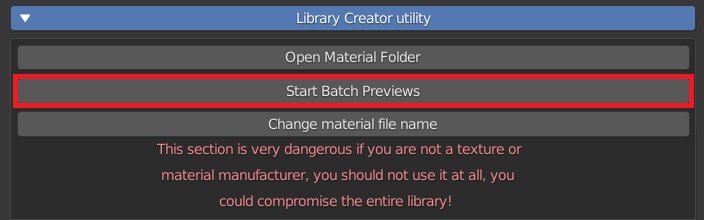
This instrument is very delicate and must be fully learned as regards its real function. It was really used to facilitate the actual creation of Extreme PBR Preview, we felt it appropriate to leave this tool for use by the end user as well, especially for creators of materials and new libraries.
Basically it serves to replace the preview of the library.
When we at Extreme Addons created the previews of the library, at the beginning we had some white “Fake” previews, from then on we did a “Start batch previews” and we created the current previews present in the main Extreme PBR library. The previews can be rewritten if, for example, the quality level does not meet your needs.
Start Batch Previews popup panel:
Object Type: Enum in [‘Sphere’, ‘Plane’] Decide which type of preview to use, the “Plane” is useful for materials with Alpha Channel.
Rot X, Rot Y: The rotation of the preview object
Exclude Reflections: Excludes reflection to the material in the preview
Use auto Size: Automatically positions the camera if activating the displace, it goes beyond the limits of the camera.
Only Current Material: If Active Create the preview only on the material that has been selected from the library from the preview of the main panel of Extreme PBR
From Cat / To Cat: It decides from which category to which category to execute the Batch Render of the previews. To start from the first Category set “0” in “From Cat”, while in “To Cat” it is the numerical limit of the list of categories. Note that the list starts at 0, so the first category in your library will be number 0.
Use Shade Smooth: If active Using interpolated vertex normals, the mesh faces will blur at the edges and appear smooth.
Use Auto Smooth: If active the edges where an angle between the faces is smaller than specified in the Angle field will be smoothed, when shading of these parts of the mesh is set to smooth. This is an easier way to combine smooth and sharp edges.
Angle: The angle of the Auto Smooth
Use displace if Exist: If active and if there is a displace map in the material, it can be displayed in the preview.
Max Subdivision: Subdivision of the object of the preview, the higher it is and the more the displacement will be aesthetically better. The rendering time is affected a lot, the higher it is the more time it takes to render. Leave at 0 To have a displacement with a render in the shortest possible time.
Displace Strength: Adjust the amount of displacement
Smooth Factor: Smooths sharp edges derived from displacement
Smooth Iterations: The number of smoothing iterations, equivalent to executing the Smooth tool multiple times.
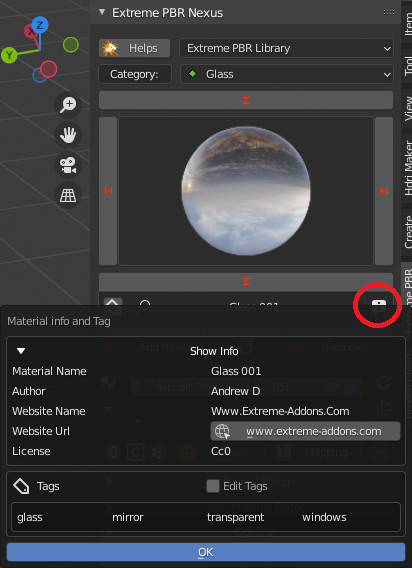
Create the json file needed to show the “Material info” in the Extreme PBR main panel of the single and current material in the preview. Display the menu
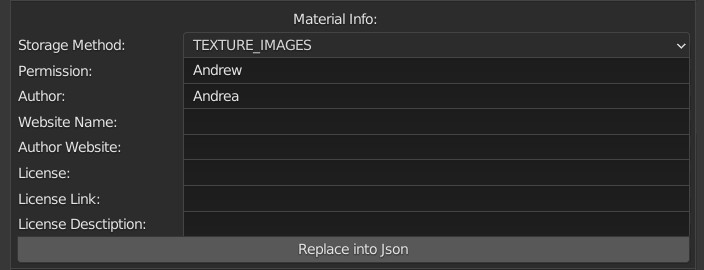
These fields to be filled in are used to show the following properties in the Extreme PBR panel once registered:
Storage method: (This is essential to make Extreme PBR recognize what type of material it is, consequently facilitating the import into the normal workflow of the end user.)
TEXTURE_IMAGE: If your material is full Texture based (Like Extreme PBR texture library)
SAVE_MODULE: If you have built your own procedural module, then not a texture type.
SAVE_MATERIAL: If you want to save the entire material (Not recommended)
Permission: This is a kind of password to avoid damaging your library by the end user. For example our library has a special permission, which can be easily traced, but the basic task is not to allow the end user to damage the libraries by mistake. For example, if you enter the name “Your name” as permission, to further modify this json file, you will need to remember the previous name “Your name” to be able to modify it. (The json file is in the material folder in case you forgot “Your name”)
Author: If you want you can enter your name, or that of your company, it will be shown as in the example of the image above.
Website Name: If you have a site or something like that, even a social media page, you should enter its name here.
Author Website: Here if you want you can enter the exact url to the Web page that you want to show the end user, then as in the upper image, a button will appear, clicking it will take you to your chosen internet page.
License: Here you should enter what type of license to enter, this is essential for the end user, to make them understand what they can or cannot do with your materials
License Link: If you have a link to the license, here you should enter a URL, a button will be shown that once clicked will take the end user to better read the license you have decided to use.
License Description: Here if you want you can enter a brief description of what it can do and what it cannot do, so that the end user is clear about what he can and what he cannot do with this material.
Replace into Json: This button will only replace the information entered in the fields above, it will leave the rest of the json file unchanged.
Important licensing note! Pay close attention to the license you have chosen to use, we invite you not to violate the laws and possibly inform yourself on these useful links in order to deepen these types of licenses: https://creativecommons.org/share-your-work/
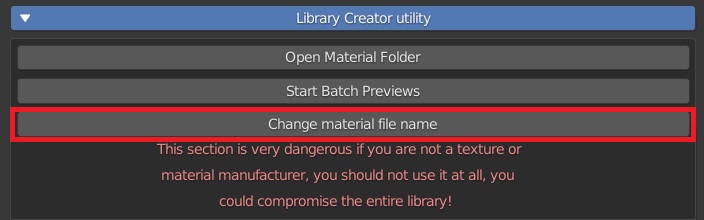
Warning, do not use in the Extreme PBR library, use only for creating new libraries!
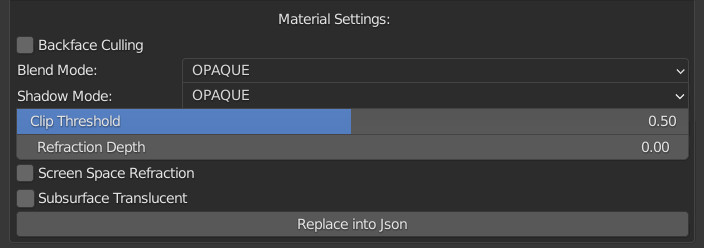
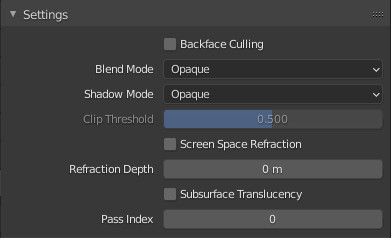
This menu is used to enter the properties of the material to be saved, these items will be stored in the json mat_info.json file, this allows you to automatically set those properties when the user adds to the scene, it will be set with these properties
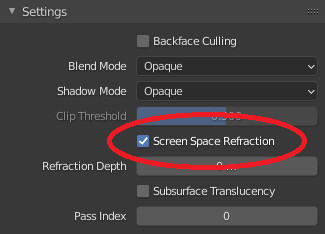
Backface Culling: Use backface culling to hide backsides of faces.
Blend Mode:
Opaque: The previous color will be overwritten by the surface color. The alpha component is ignored. This is the fastest option.
Alpha Clip: The previous color will be overwritten by the surface color, but only if the alpha value is above the clip threshold.
Alpha Hashed: The previous color will be overwritten by the surface color, but only if the alpha value is above a random clip threshold. This statistical approach is noisy but is able to approximate alpha blending without any sorting problem. Increasing the sample count in the render settings will reduce the resulting noise.
Alpha Blending: Use alpha blending to overlay the surface color on top of the previous color.
Shadow Mode:
None: The surface will not cast any shadow.
Opaque: The surface will cast shadows like an opaque surface.
Clip: The surface will cast shadows like an opaque surface, but only areas where the alpha value is above the clip threshold.
Hashed: The surface will cast shadows like an opaque surface, but only areas where the alpha value is above a random threshold.
Clip Threshold: A pixel is rendered only if its alphavalue is above this threshold
Screen Space Refraction: Use raytraced screen space refraction.
Subsurface Translucent: If active Subsurface traslucent will be stored in the material
Replace into Json: You will only be able to replace these properties if you don’t want to change the whole mat_info.json file
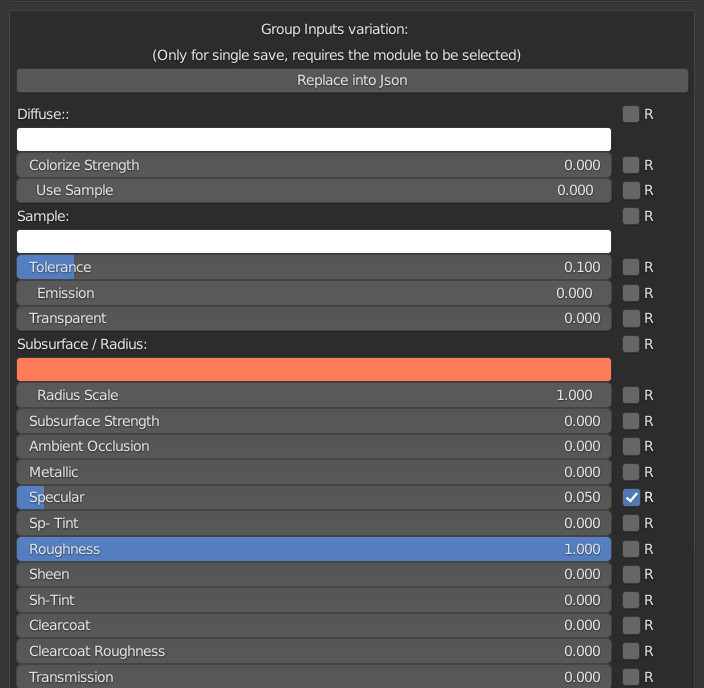
This menu is used to save the material properties.
Example:
You want the Metallic material you created with the textures to be set with a Specular of 0.05, just check the box next to the Roughness set to your liking and press the Replace into json button.
Note: To show this Menu, you must be in the Main Node Tree of an Extreme PBR material, you must have selected 1 Module / Fx, to view the properties to be stored.
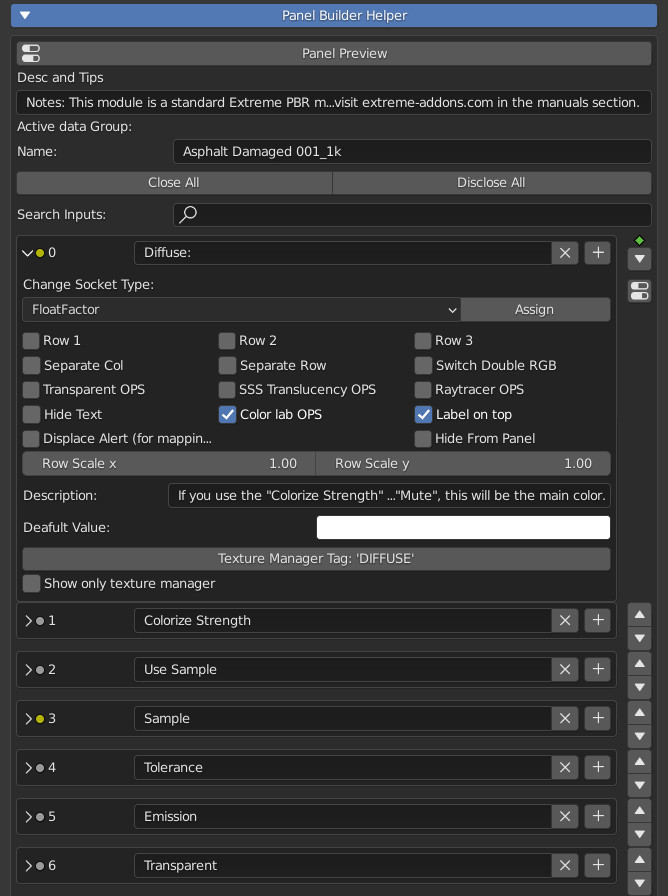
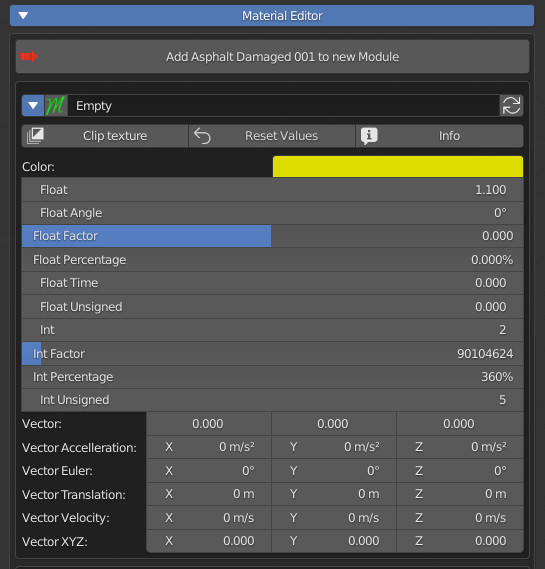
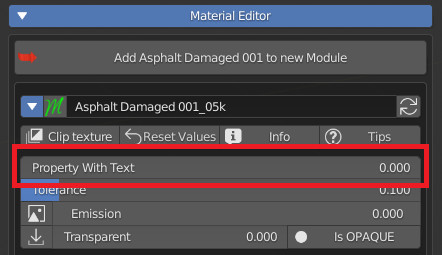
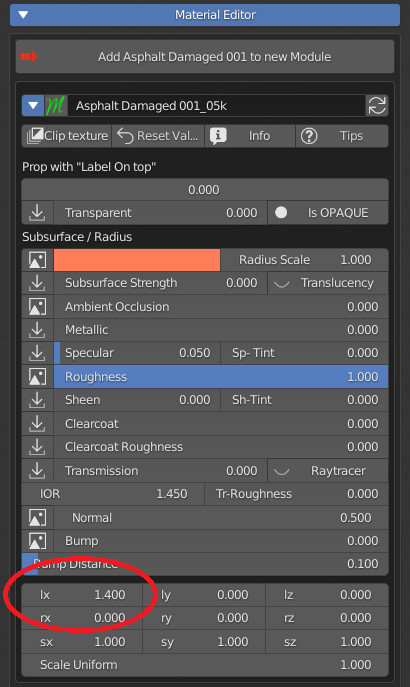
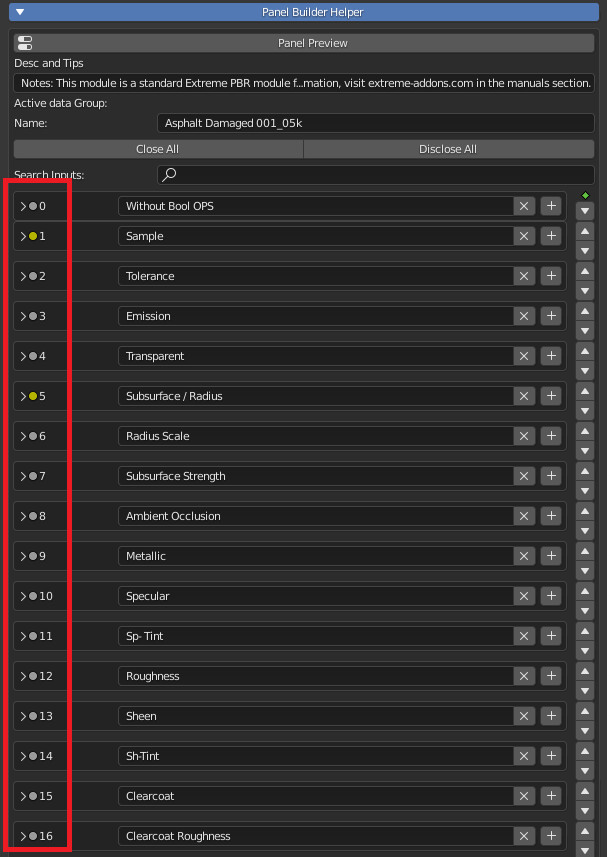
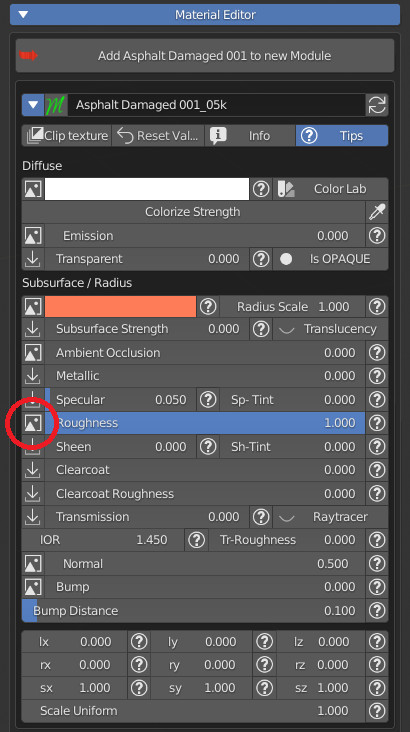
This menu is dedicated to creating the interface of the “Material Editor” panel in the main interface of Extreme PBR. So everything that will be modified through this menu will have Technical and Graphic effects in the Extreme PBR panel:
Here you create and design your panel:
Here you will see the result of your composition
Desc and Tips:
Enter a description if you want, a button will be shown to show it in a popup. Useful to help the user. Enter a minimum of 10 characters to show the description
Name:
The name of the “Node Group” that is the name of the “Module” of Extreme PBR, This is officially the name of the “Name” property of the Blender Groups.
Close/Disclose All:
These two buttons open or close ALL the Sockets Below.
Search Inputs:
Search for inputs Sockets by their name, only sockets containing the searched keyword will be shown.
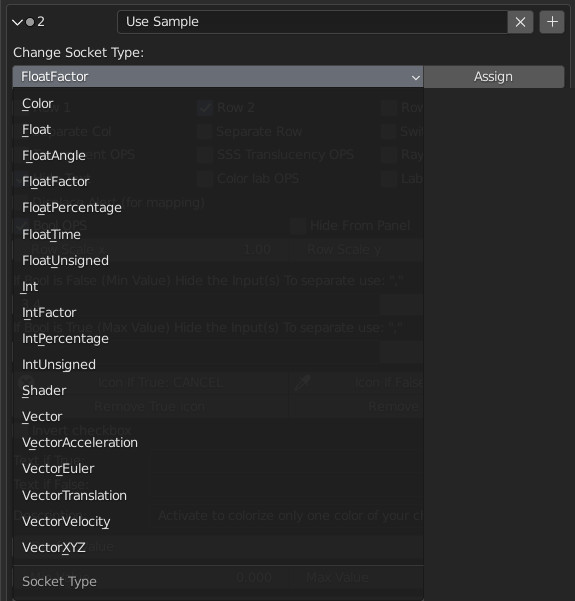
This property is used to change the type of Socket, the socket will remain in the same place, connected to any links within the module. This is very useful for changing the type of Socket, so it will change the type of controls associated with it.
Below we have an example of the types of Sockets that can be used, they are practically all those available in Blender, some of them are not needed by Extreme PBR, we have left them, in the case of suggestions from users who can tell us what they think.
We suggest testing directly to find the best type of Properties to create your own custom panels.
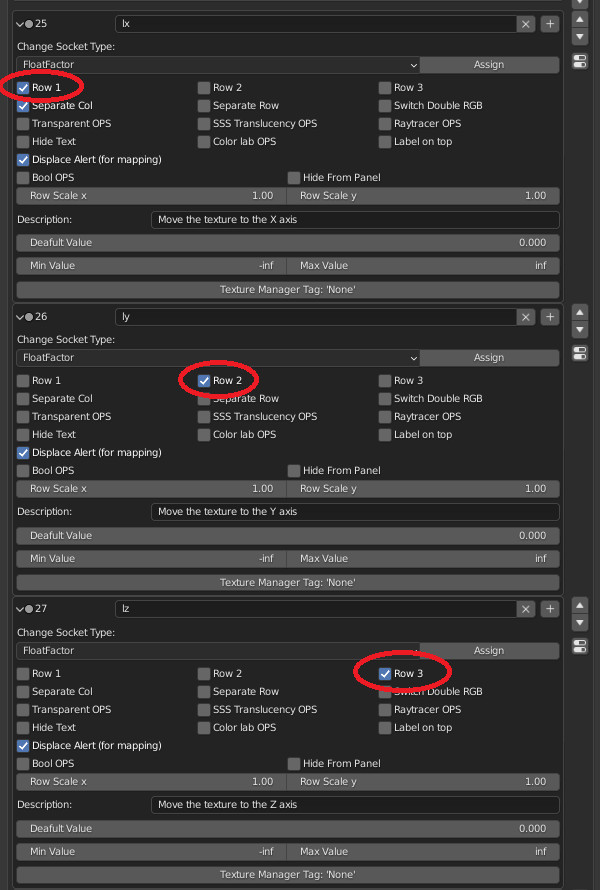
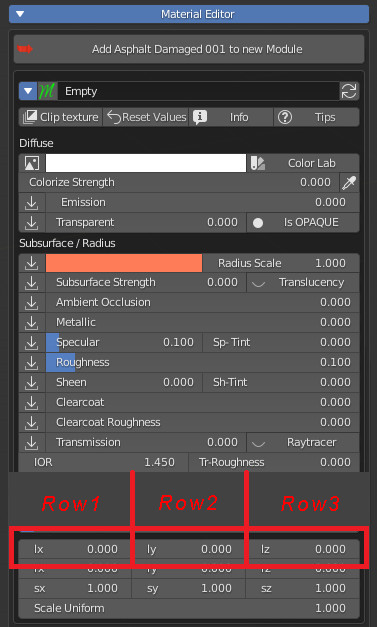
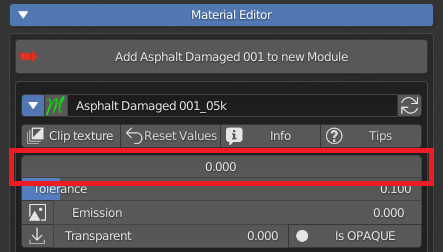
Row 1: If you want to start with a sequence of Properties on the same line, you will need to check Row1, so you will know that that property is the first to be placed in line.
Row 2: This will be the second property on the same line, it will only work if the previous socket (i.e. the one just above) is checked.
Row 3: This will be the third property on the same line, it will only work if the previous socket (i.e. the one just above) is checked, and the one even earlier.
We have chosen to put a maximum of 3 Row, in order not to make the interface potentially unreadable for the end user.
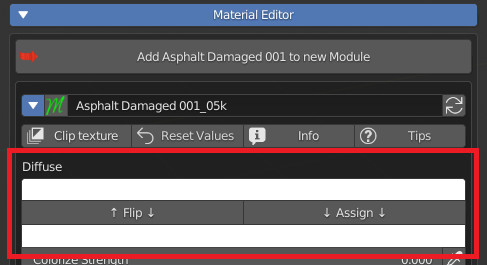
This property requires 2 consecutive “Color” Sockets, as it is used to show 2 buttons (Flip, Assign) which are useful for switching the 2 colors upside down or for assigning the upper color to the lower one.
Note: This is useful in regards to using the Eevee render engine.
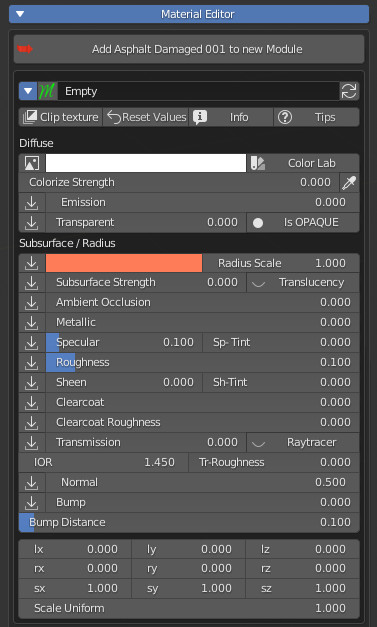
If activated, it will show next to the property in the panel, a button, which pressed several times, will activate in sequence these material settings in Blender:
Is Opaque:
Blend Mode = Opaque
Shadow Mode = Opaque
Is Blend:
Blend Mode = Alpha Blend
Shadow Mode = Alpha Hashed
Is Hashed:
Blend Mode = Alpha Hashed
Shadow Mode = Alpha Hashed
Is Clip:
Blend Mode = Alpha Clip
Shadow Mode = Alpha Clip
Substantially, the properties of the “Settings” material will be changed, in order to make it easy for the end user to choose the best configuration.
If activated, it will show in the panel a button next to the property where you can give the possibility to reach the Translucency This button will also resolve conflicts with “Screen space Refraction”, in fact if it should be active, it will be deactivated once the button is pressed.
Basically this is a Boolean (On Off) button which is the native property of blender to enable or disable Blender’s native “Subsurface Translucency”.
If activated, it will show next to the property in the Extreme PBR panel, a Boolean On / Off button, to activate the Screen Space Refraction, this is useful if you work with Eevee, and makes it much easier for the end user to activate or deactivate it. property.
Note: If “Subsurface Translucency” is active, this button will deactivate it.
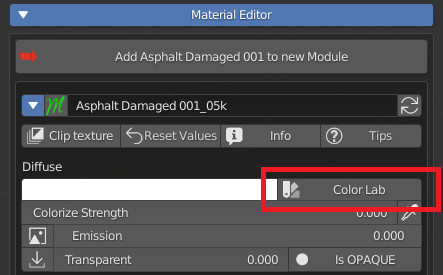
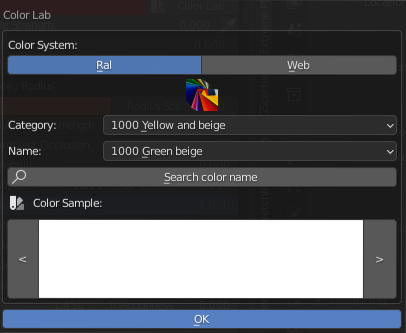
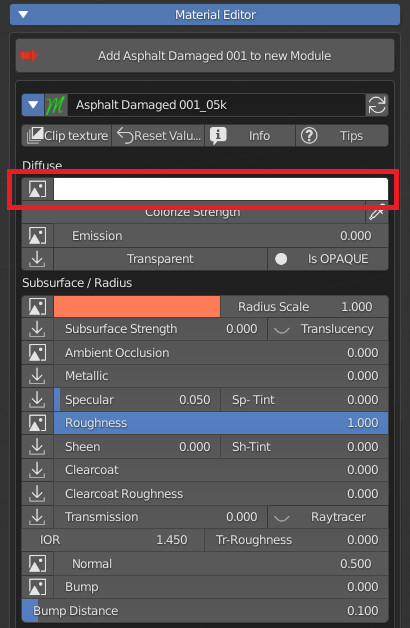
This can activate a very useful tool for the end user, namely the “Color Lab” operator. A button next to this Color property, this is used to open a Popup Panel that contains the tools that contain 2 Color Systems (Ral, Web). This panel is useful for finding the desired colors among those in the color list.
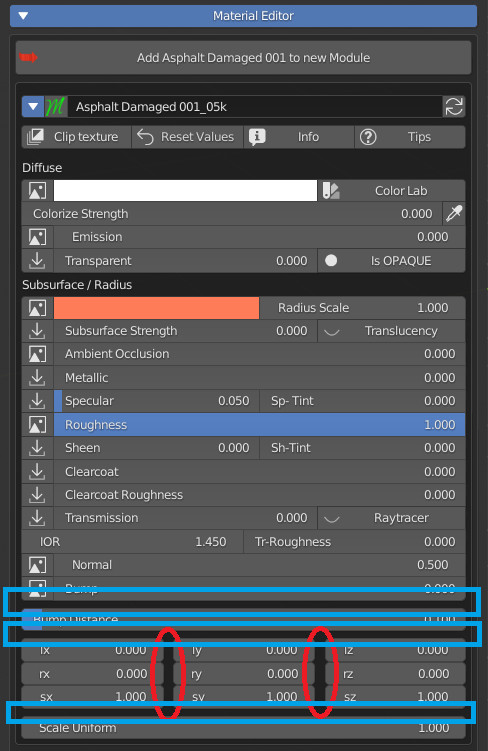
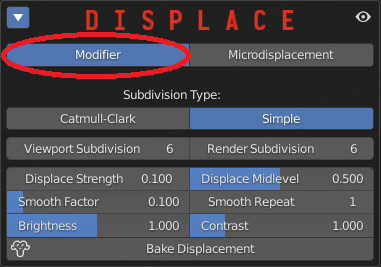
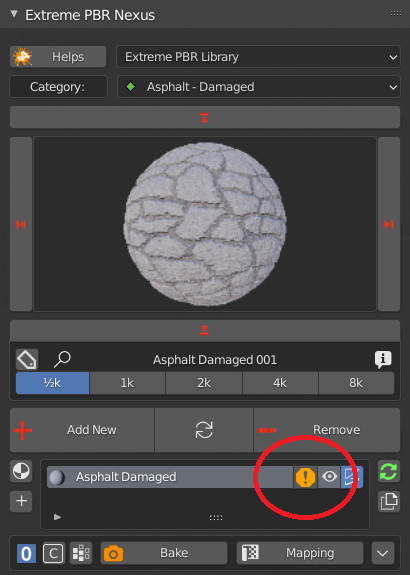
If displace is active, and this value is not the default value, Show the alert button next to the button displaced in the object’s materials panel. If the Displacement is in modifier mode. User alert useful for not breaking the displacement view.
Why this?
Because as in the case in the example, if the Vector properties are modified, the displace map will not be moved, so this will cause an inconsistency between “The UV displacement mapping” and the Mapping Procedurally modified by moving the vectors mapping of the material. In fact, in the Extreme PBR panel we also have a panel to modify the UV mapping (Loc, Rot, Scale) which avoids this problem
Example:
If the Displace is set to “Modifier”
In this example, all the properties (Vector X, Y, Z) of the Extreme PBR panel have the “Displace Alert” property active, so if these values are changed, an alert button will be shown, as in the example here. right
Below is an example of the “Displace Alert” button, if pressed, it will restore all the properties with the “Displace Alert” active, to the default values.
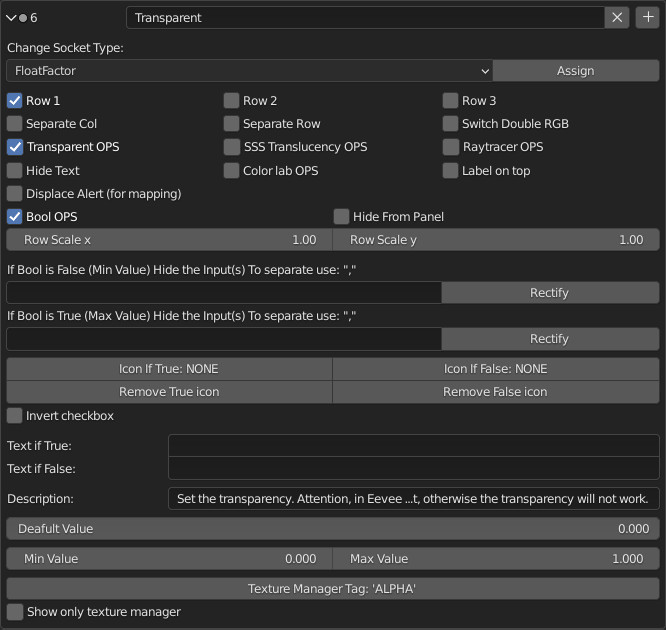
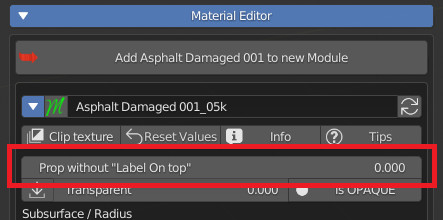
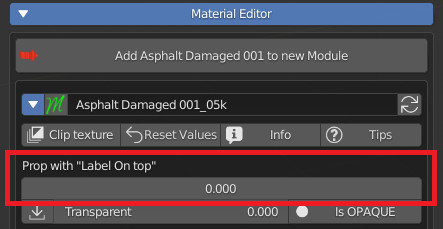
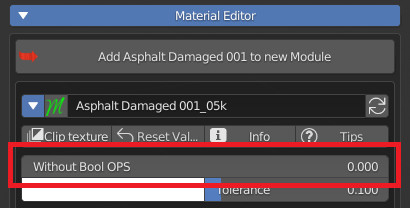
If activated, this will replace the slider, with a Boolean Button, in the Extreme PBR panel.
Example:
Without Bool OPS (Slider)
With Bool OPS (Button)
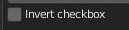
Invert CheckBox:
If Bool OPS is active, a further Property will be shown, ie “Invert Checkbox”, this is used to invert True False, then the Boolean button will turn on if False and it will turn off if True.
How to setup:
Keep in mind that a turned off Boolean will assume the “Min Value” value, while a turned on Boolean will assume the “Max Value” value. So if you use Bool OPS, with a “Min Value” of 0 and a “Max Value” of 2, the Boolean Button will assume the value 0 from “False” and the value 2 from True. Remember to set the default value to one of the two values you set as “Min Value” or “Max Value” do not use intermediate or different values, as it will not work very well and could create problems for end users.
Default Value/ Min Value/ Max Value:
Once Bool OPS is activated, New Properties will appear in the Socket Menu:
Text If True/False:
Here you can set 2 alternate texts if the Boolean prop is True or False.
Icon If True/False:
If you want to put icons on the Boolean button, you can choose which icons (Blender native ones), and you can choose both for Boolean True False, then 2 different icons for the two stages of the Boolean button
True/False, Remove
To remove icons from the button, press “Remove” under True / False respectively
Icon Manager Panel:
Here you can choose your icons to apply to the Boolean Button
Bool Exclusion:
Pay close attention. Here you can enter 2 lists of Sockets to exclude. The first list will hide the properties from the user panel, if the button is True (i.e. active) The second list will hide the property from the user panel if the button is False. Separate numbers with commas (“,”) This is useful to exclude Slider or other, if in the case the Boolean button must exclude some controls that in a given situation are not useful.
Rectify: This button is used to fix any formatting errors in the list, this is to make sure that the list has been compiled correctly.
The socket to be hidden must be different from itself.
To identify the socket number to exclude, you will be able to look at the socket number directly from this panel
(If you change the order of the sockets, you will need to double check the numeric list and update it.)
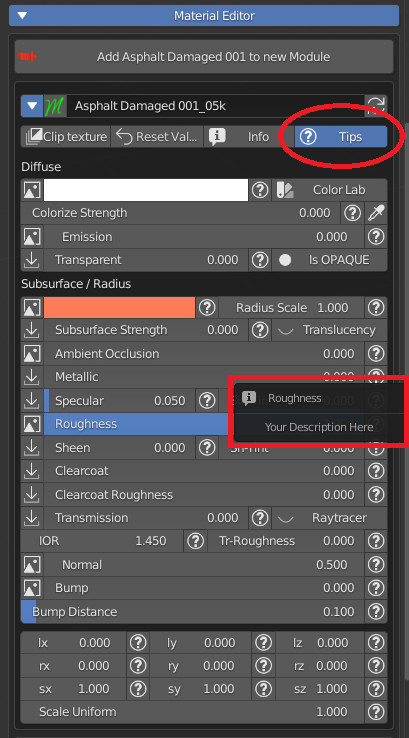
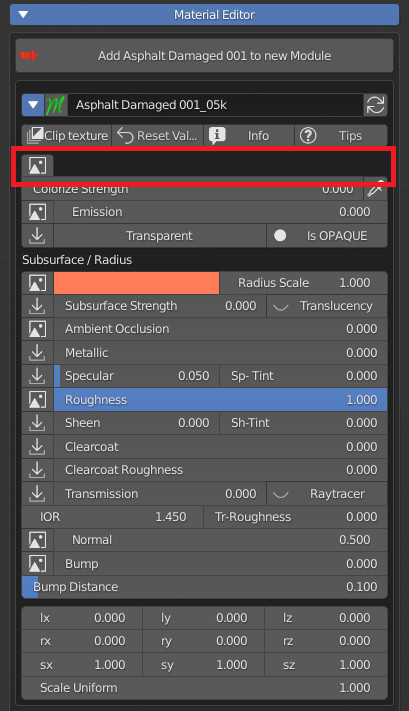
If you fill in this field, the end user pressing the “TIps” button from the Extreme PBR panel will show some buttons at each property (Only if a description is not empty)
Example:
In this example, you can see that activating the Tips button will show small buttons with a circled question mark. If the user presses these buttons, he will have access to your description into popup.
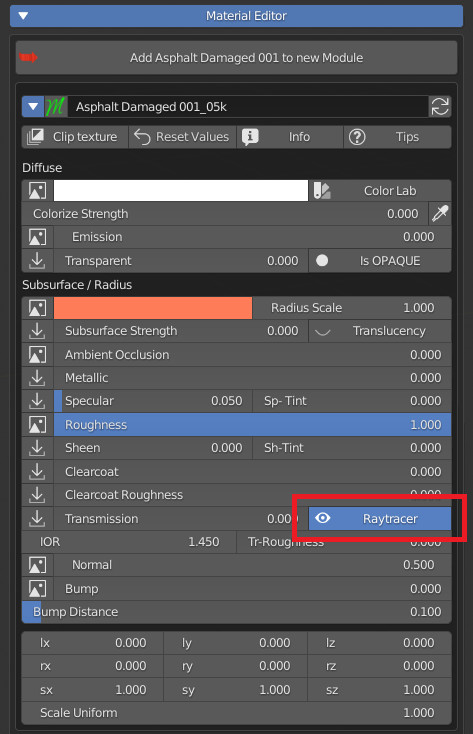
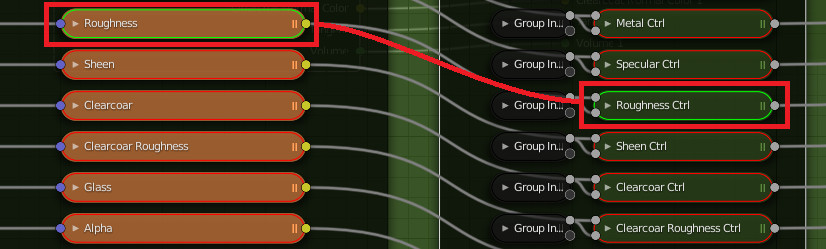
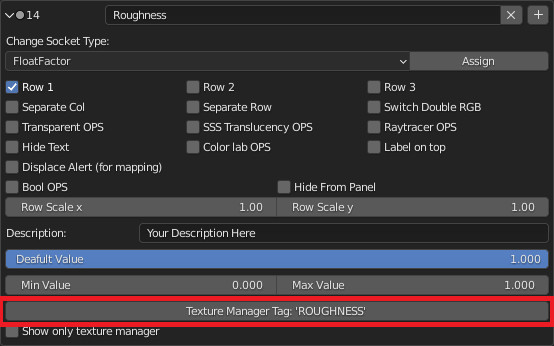
“Texture Manager Tag” is used to show a button in the Exreme PBR panel to bring up the Texture Manager. Note: This is needed if you use this sequence of nodes in the Module:
Example Whit Roughness With “ROUGHNESS” Tag into Node Image.
Now the “Roughness” Tag will also be set on the Socket:
Now a button will be shown in the main panel of Extreme PBR:
This button once pressed the user will have access to the Texture Manager:
To show this button, remember that you need to have an Image Type Tagged node with the same Tag as the socket.