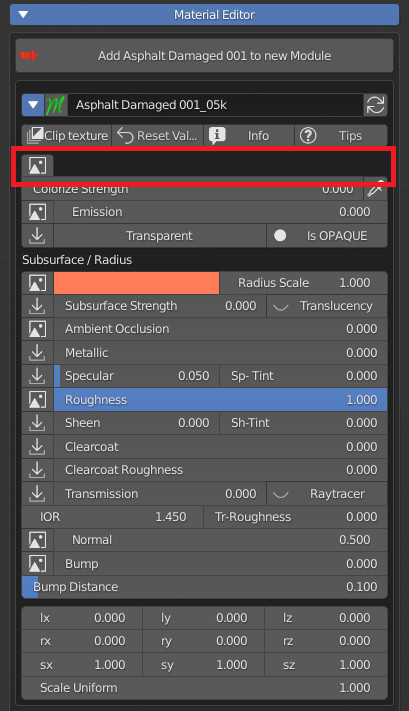
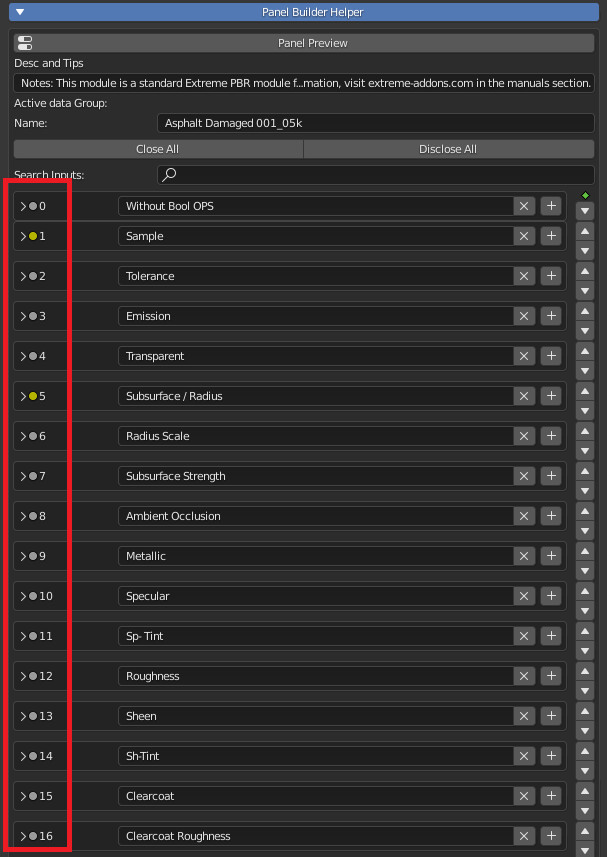
This is where you set up the graphics and function of each single input socket of Extreme PBR’s “Module” / “Fx” group node
This is where you set up the graphics and function of each single input socket of Extreme PBR’s “Module” / “Fx” group node
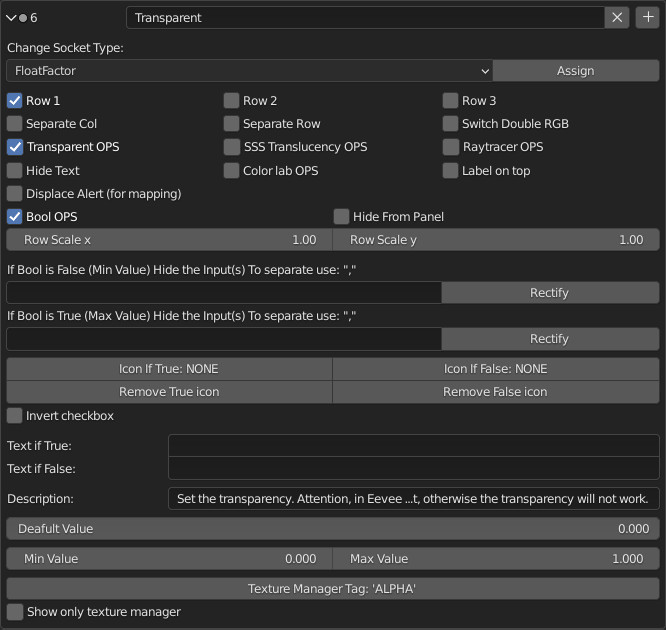
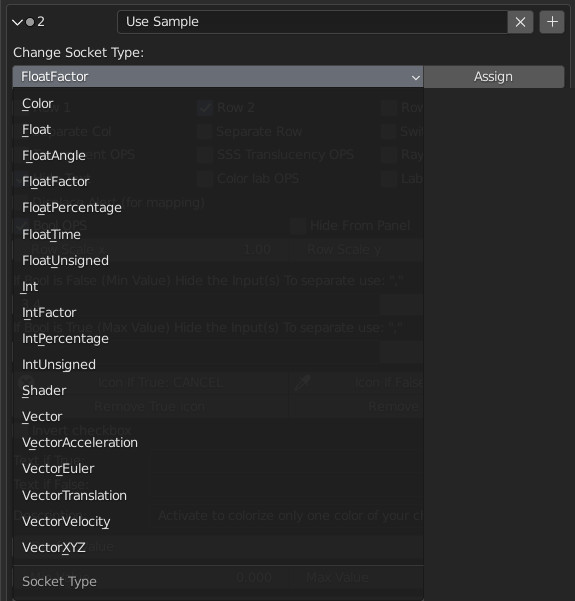
This property is used to change the type of Socket, the socket will remain in the same place, connected to any links within the module.
This is very useful for changing the type of Socket, so it will change the type of controls associated with it.

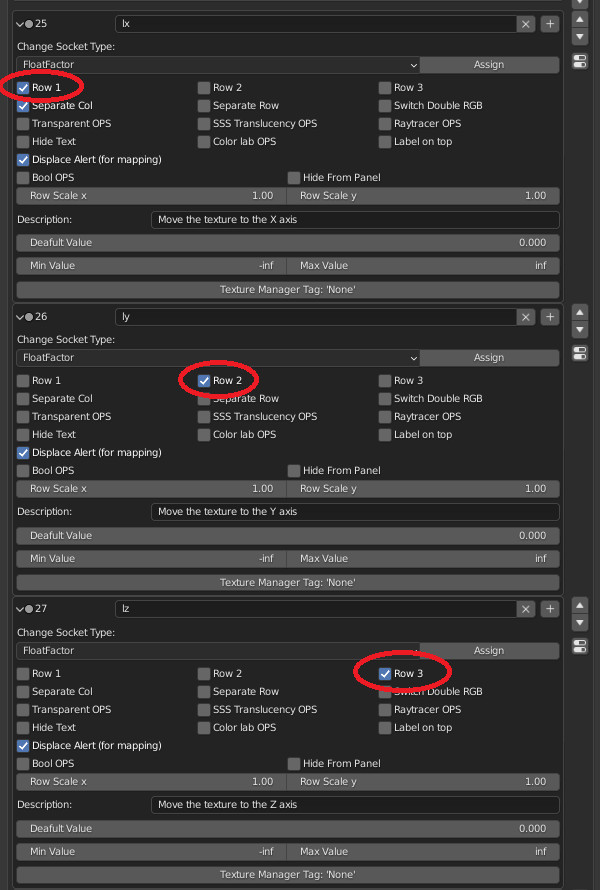
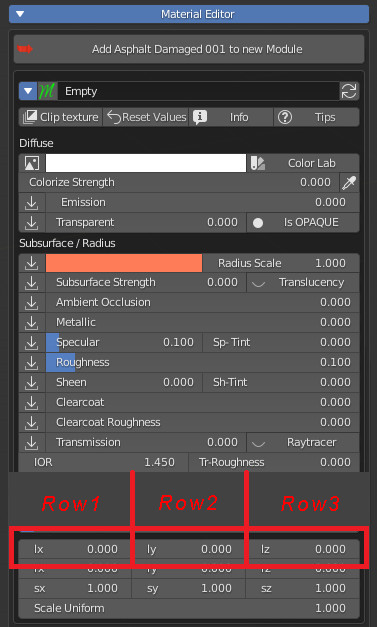
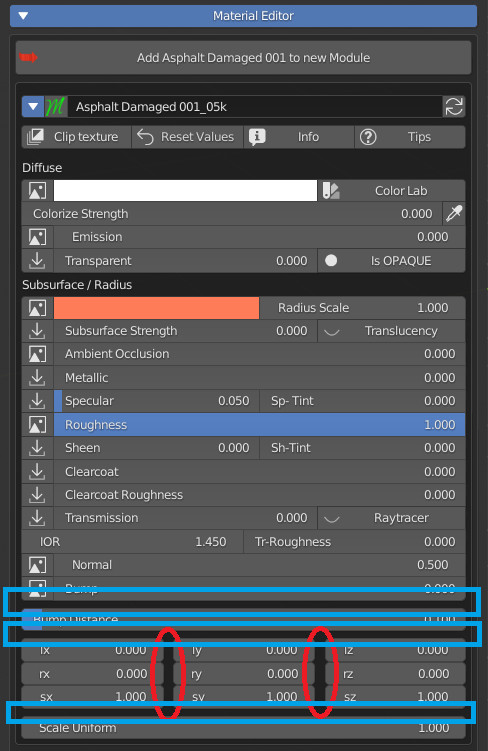
Row 1: If you want to start with a sequence of Properties on the same line, you will need to check Row1, so you will know that that property is the first to be placed in line.
Row 2: This will be the second property on the same line, it will only work if the previous socket (i.e. the one just above) is checked.
Row 3: This will be the third property on the same line, it will only work if the previous socket (i.e. the one just above) is checked, and the one even earlier.
We have chosen to put a maximum of 3 Row, in order not to make the interface potentially unreadable for the end user.
These two properties, if activated, will be separated from the previous property

Separate the column from the previous one.
Separate the row from the previous one.
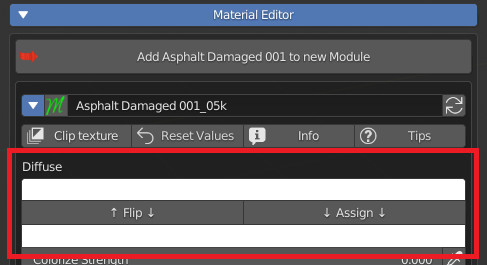
This property requires 2 consecutive “Color” Sockets, as it is used to show 2 buttons (Flip, Assign) which are useful for switching the 2 colors upside down or for assigning the upper color to the lower one.
Note: This is useful in regards to using the Eevee render engine.
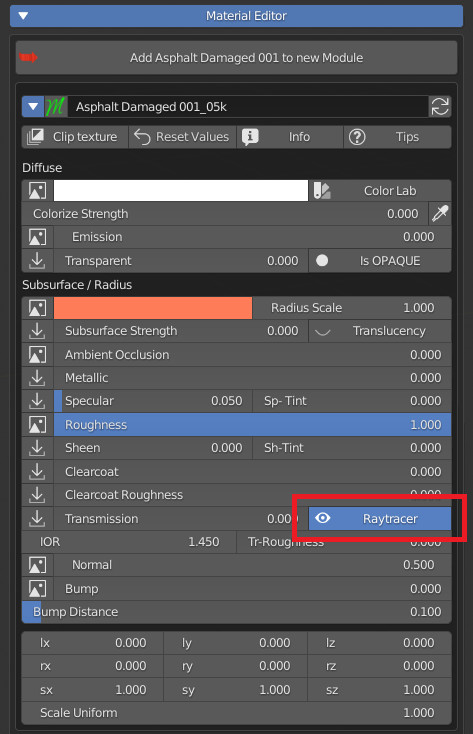
If activated, it will show next to the property in the panel, a button, which pressed several times, will activate in sequence these material settings in Blender:
If activated, it will show in the panel a button next to the property where you can give the possibility to reach the Translucency
This button will also resolve conflicts with “Screen space Refraction”, in fact if it should be active, it will be deactivated once the button is pressed.
Basically this is a Boolean (On Off) button which is the native property of blender to enable or disable Blender’s native “Subsurface Translucency”.
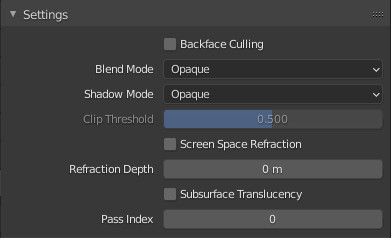
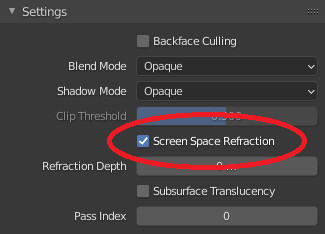
If activated, it will show next to the property in the Extreme PBR panel, a Boolean On / Off button, to activate the Screen Space Refraction, this is useful if you work with Eevee, and makes it much easier for the end user to activate or deactivate it. property.
Note: If “Subsurface Translucency” is active, this button will deactivate it.

If activated, it will hide the Socket name in the Extreme PBR panel

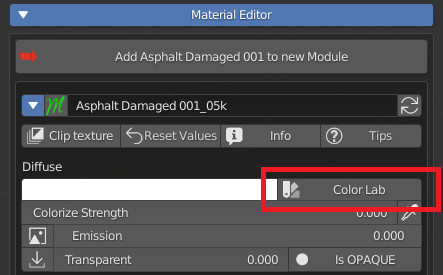
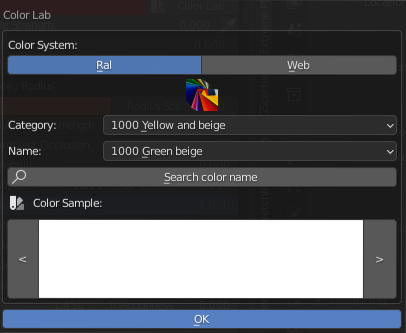
This can activate a very useful tool for the end user, namely the “Color Lab” operator. A button next to this Color property, this is used to open a Popup Panel that contains the tools that contain 2 Color Systems (Ral, Web).
This panel is useful for finding the desired colors among those in the color list.

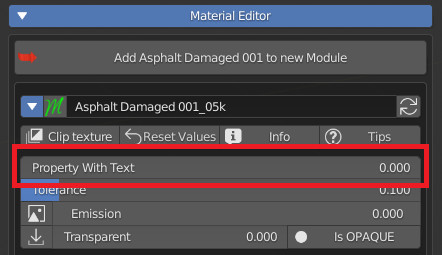
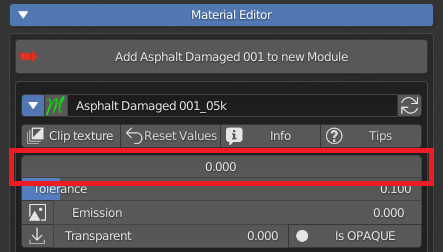
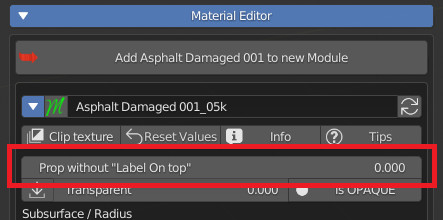
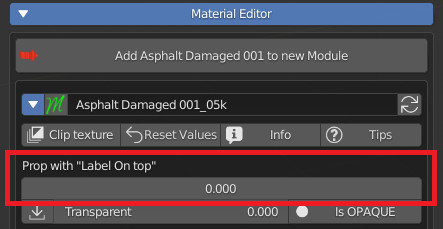
“Label on Top” is useful for moving text above the property.
This is very useful for “Decorating” the panel, making the design of it much more “Clean”.

If displace is active, and this value is not the default value, Show the alert button next to the button displaced in the object’s materials panel. If the Displacement is in modifier mode. User alert useful for not breaking the displacement view.

Because as in the case in the example, if the Vector properties are modified, the displace map will not be moved, so this will cause an inconsistency between “The UV displacement mapping” and the Mapping Procedurally modified by moving the vectors mapping of the material.
In fact, in the Extreme PBR panel we also have a panel to modify the UV mapping (Loc, Rot, Scale) which avoids this problem
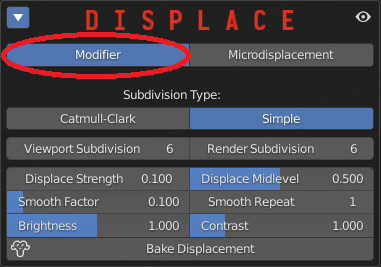
If the Displace is set to “Modifier”
In this example, all the properties (Vector X, Y, Z) of the Extreme PBR panel have the “Displace Alert” property active, so if these values are changed, an alert button will be shown, as in the example here. right
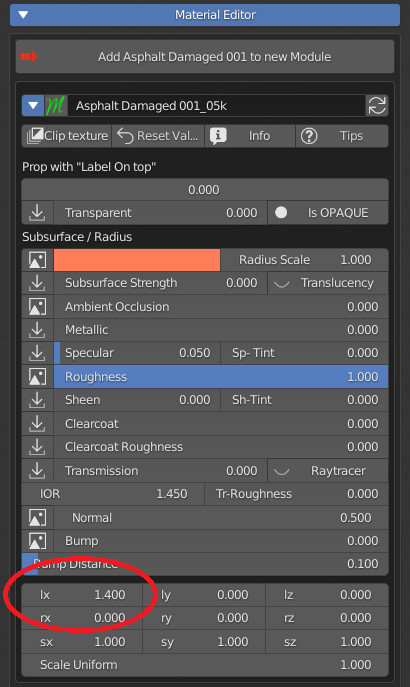
Below is an example of the “Displace Alert” button, if pressed, it will restore all the properties with the “Displace Alert” active, to the default values.

If enabled, this will not be shown in the Extreme PBR panel.
Only for sockets other than “Color” and “Vector”.

If activated, this will replace the slider, with a Boolean Button, in the Extreme PBR panel.
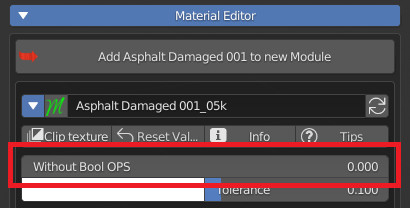

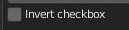
If Bool OPS is active, a further Property will be shown, ie “Invert Checkbox”, this is used to invert True False, then the Boolean button will turn on if False and it will turn off if True.
Keep in mind that a turned off Boolean will assume the “Min Value” value, while a turned on Boolean will assume the “Max Value” value.
So if you use Bool OPS, with a “Min Value” of 0 and a “Max Value” of 2, the Boolean Button will assume the value 0 from “False” and the value 2 from True.
Remember to set the default value to one of the two values you set as “Min Value” or “Max Value” do not use intermediate or different values, as it will not work very well and could create problems for end users.

Here you can set 2 alternate texts if the Boolean prop is True or False.

If you want to put icons on the Boolean button, you can choose which icons (Blender native ones), and you can choose both for Boolean True False, then 2 different icons for the two stages of the Boolean button
To remove icons from the button, press “Remove” under True / False respectively
Here you can choose your icons to apply to the Boolean Button
Pay close attention. Here you can enter 2 lists of Sockets to exclude.
The first list will hide the properties from the user panel, if the button is True (i.e. active)
The second list will hide the property from the user panel if the button is False.
Separate numbers with commas (“,”)
This is useful to exclude Slider or other, if in the case the Boolean button must exclude some controls that in a given situation are not useful.
Rectify: This button is used to fix any formatting errors in the list, this is to make sure that the list has been compiled correctly.
The socket to be hidden must be different from itself.

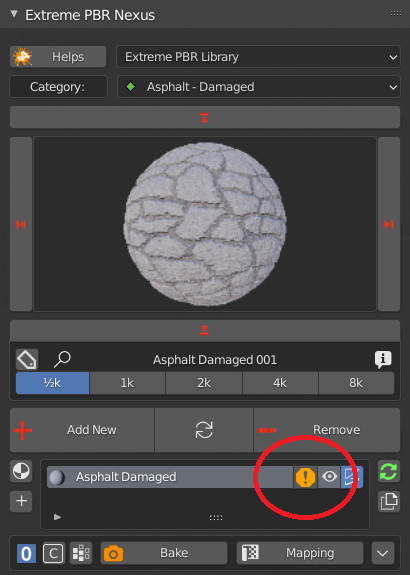
To identify the socket number to exclude, you will be able to look at the socket number directly from this panel
(If you change the order of the sockets, you will need to double check the numeric list and update it.)
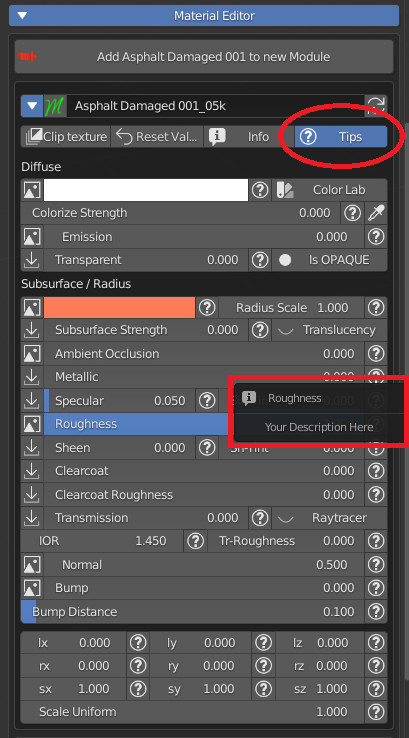
If you fill in this field, the end user pressing the “TIps” button from the Extreme PBR panel will show some buttons at each property (Only if a description is not empty)

In this example, you can see that activating the Tips button will show small buttons with a circled question mark.
If the user presses these buttons, he will have access to your description into popup.

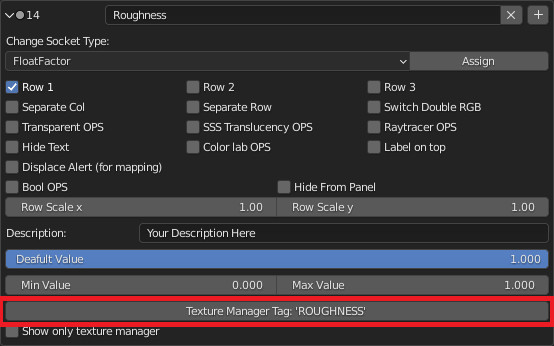
“Texture Manager Tag” is used to show a button in the Exreme PBR panel to bring up the Texture Manager.
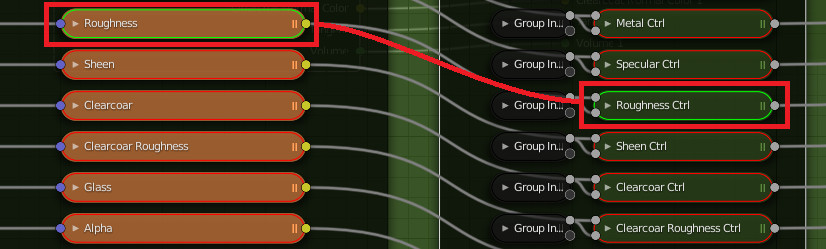
Note: This is needed if you use this sequence of nodes in the Module:
Example Whit Roughness With “ROUGHNESS” Tag into Node Image.
Now the “Roughness” Tag will also be set on the Socket:
Now a button will be shown in the main panel of Extreme PBR:
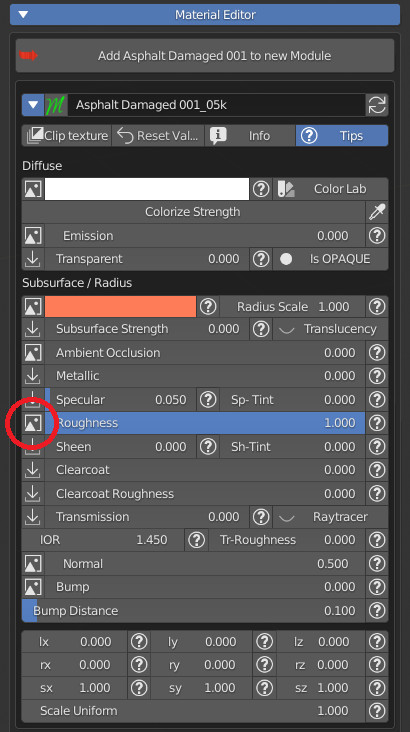
To show this button, remember that you need to have an Image Type Tagged node with the same Tag as the socket.


If activated it will only show the “Texture Manager” button on the property in the main Blender panel:
Without “Show Only Texture Manager”:
With “Show Only Texture Manager”: