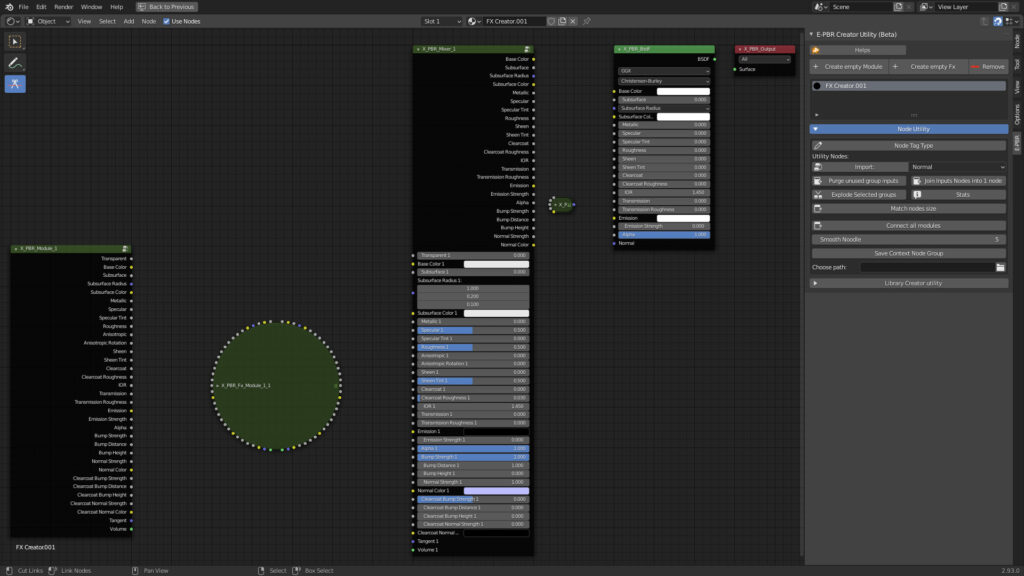
A quick look at the open “Node Utility” menu panel.
Note, this panel will only be shown if a material is active or selected.
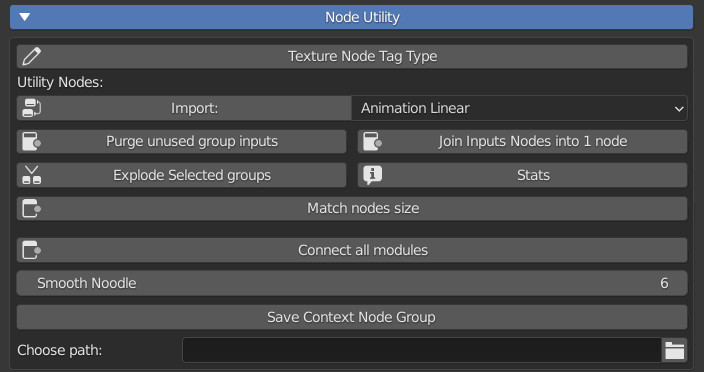
Note: This menu was created during the Extreme PBR programming phase, we decided to leave it due to the usefulness of the functions inside. It is mainly used to manipulate the nodes inside the standard Extreme PBR modules.
Attention, if you are an end user and not a material producer, you should not use these tools in your 3D projects, otherwise you could damage your work.
Not recommended for use during your 3D projects
A quick look at the open “Node Utility” menu panel.
Note, this panel will only be shown if a material is active or selected.

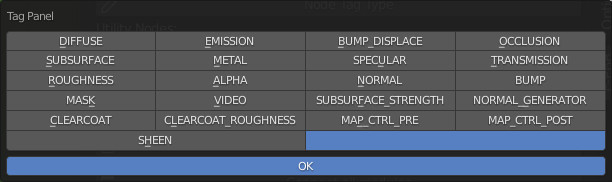
Attention, this button works ONLY in this case:
Once this button is pressed, a popup will appear:

From the Popup Panel it is possible to assign the TAG to the selected Texture Type node (Choose the tag and press OK).
Note: It is not necessary to use TAGs to create new Material Modules, but it is useful if you want to keep the operation of Essential Functions of the standard Extreme PBR Texture-based materials.
This Nodes example is a classic Texture Based Material from Extreme PBR with related TAGs:

To Remove the TAG, press the empty button from the popup panel and Press Ok.
This tool is used to facilitate the creation of Modules with Extreme PBR standard group nodes. Note well, the Groups of nodes present in this small library, are the ones with which Extreme PBR was made, so you will find it useful if you are looking for some useful group nodes, for example “Linear Animation” is a nude that has an animable output, this is the most striking example.

This node is pre-animated
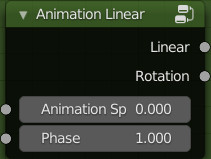
Inputs:
Outputs:
This node group hooks perfectly to the outputs of the Extreme PBR standard modules
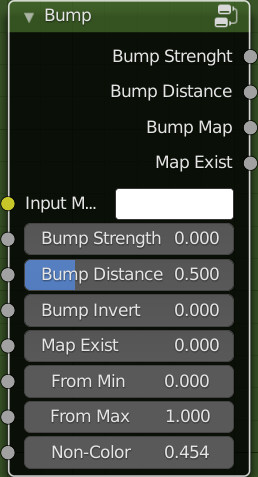
Inputs:
Outputs:
This group is used to blend and simulate an ambient occlusion.
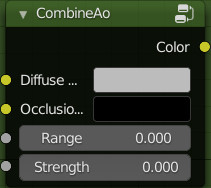
Inputs:
Outputs:
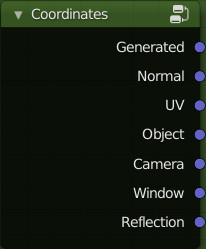
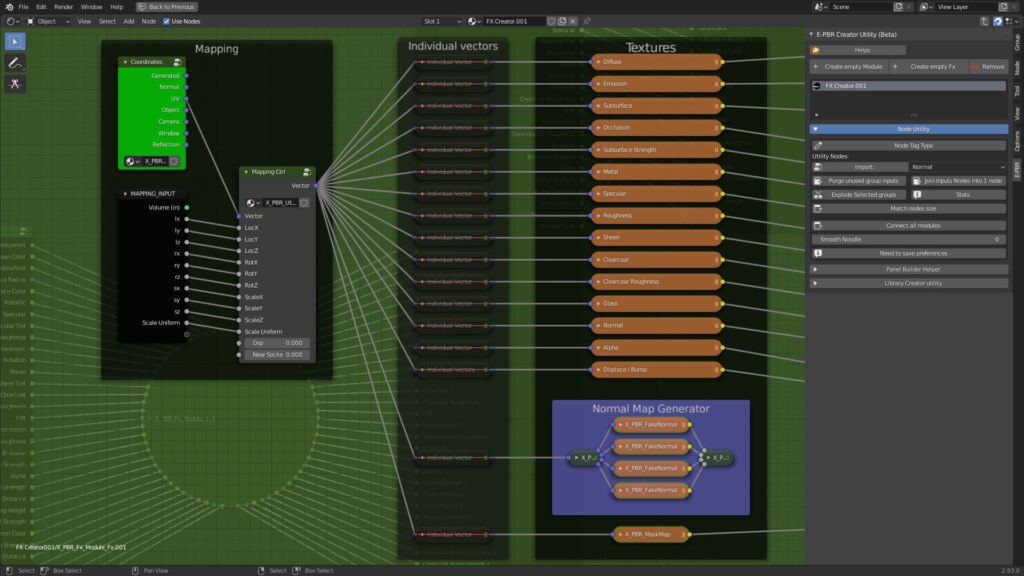
This group is the exact reproduction of the Coordinates node present in Blender, but it is recognized by Extreme PBR for the Mapping Editor tool
This group is used to adjust the Black & White type map immediately after. It is recognized by Extreme PBR and provides automatisms from the Extreme PBR panel interface.
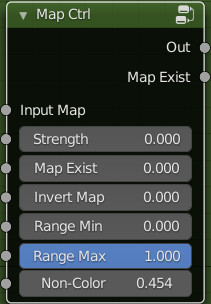
Inputs:
Outputs:
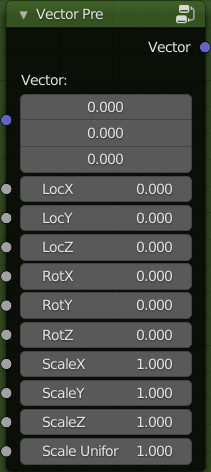
This group is very similar to Blender’s Standard Mapping node. With the difference that the 3 sockets of
the X / Y / Z vectors have been separated, and the scale has an input to scale uniformly.
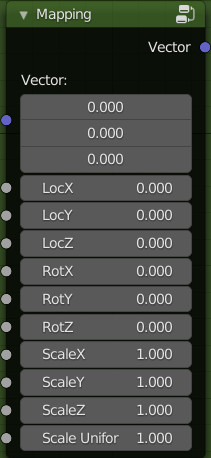
Inputs:
Outputs:
This node connects directly to the Extreme PBR module outputs, it is used to connect the Normal maps.
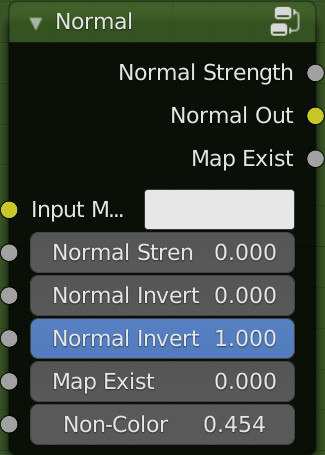
Inputs:
Outputs:
This node is similar to the Coordinates node of Blender, with a big difference, it basically serves to create the Coordinates, in a procedural way, therefore very useful to use for the creation of procedural materials. This node, if used correctly, will be able to change the links dynamically with the use directly in the Extreme PBR panel of the functions present in the Mapping Editor
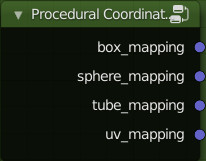
Outputs:
This Group is useful for controlling the Diffuse, some inputs are controllable through the Extreme PBR “Texture Manager” panel.
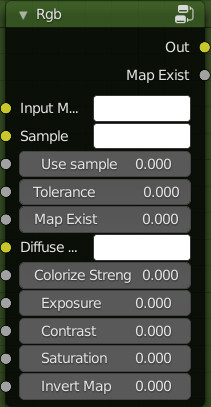
Inputs:
Outputs:
This Group is almost identical to the Mapping group, but with the difference that it can be connected directly behind a Texture Image node, making it possible through the Extreme PBR panel to show / activate / adjust the Mapping of each individual Texture Image node.
Remember to Use the “Tag Node Type” on it and on the Texture Image node to make this active in the Extreme PBR panel
Inputs:
Outputs:
These 2 Groups are to be used in pairs to produce a simulated Normal map, it needs 4 Texture image nodes (Dupplicati linked) with the same image inside. Remember to tag the “Texture Image” node with the tag “NORMAL_GENERATOR” to make the switch between Normal & Normal Generated usable directly from the Extreme PBR panel
Connection example with 4 Texture image nodes with the same Image inside:


This Button is used to remove the socket inputs of the Extreme PBR Module that have remained not-connected within the group.
On Fx type modules the input connection sockets marked with (in) will not be eliminated, as they are an integral part of the Extreme PBR system

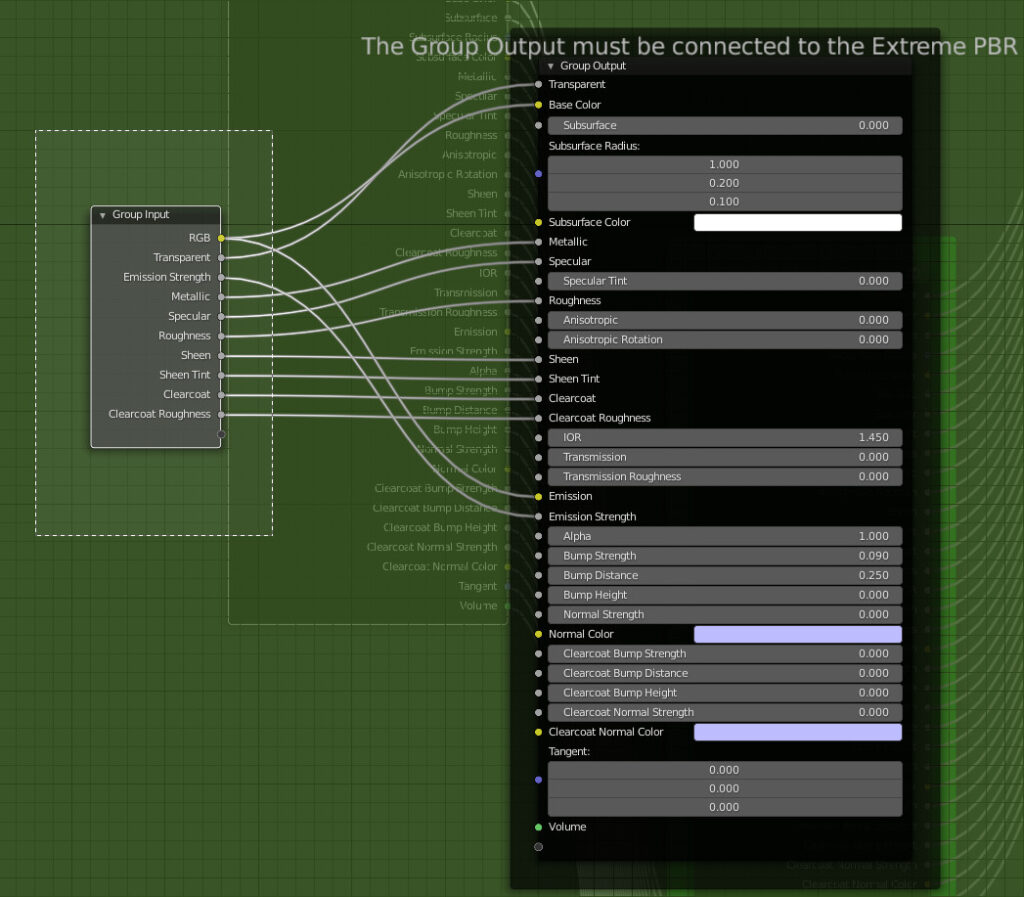
It is used to join the Inputs nodes of the Extreme PBR modules into a single inputs node.
The inputs node is divided into several nodes
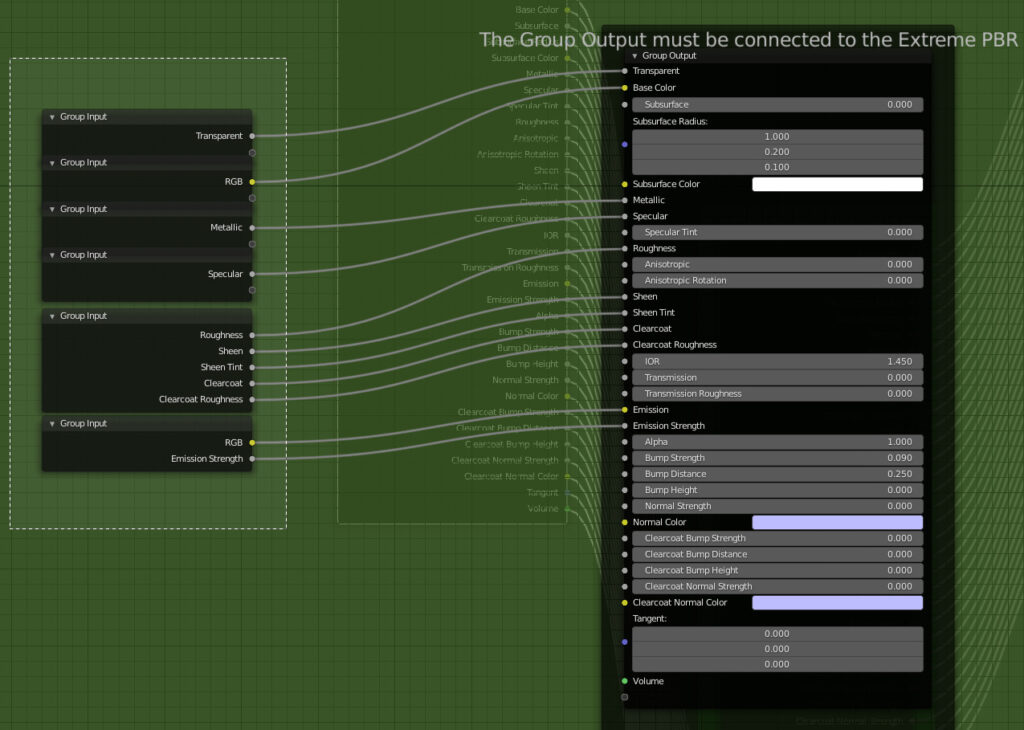
The nodes are Jointed into only 1 inputs node
This button is used to “Explode” the selected “node group”, it also works on multiple selections.
Once the group is exploded, the nodes inside will in turn be selected, consequently if there are other subgroups of nodes, pressing several times will explode all the group nodes also inside.

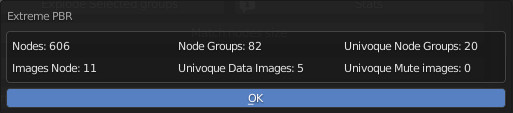
The Stats button, is used to see the statistics of the Material (node_tree) on which you are working.

Once the button is pressed a popup will be shown with the Node Tree statistics:
Match node size button it is used to make all selected nodes the same size.
Then: Select the nodes you want to resize and make the node of the desired size active, all the selected nodes will take the same size as the active node.

This button is used to connect / arrange / reposition the nodes present in the Extreme PBR Material, therefore all the modules / mixers / etc. they will be organized correctly.


It is used to smooth and round the links between nodes, this property is already present in Blender, but we have decided to make it easily accessible in this menu.


Save active group node on the fly, in the specified path, this creates a “file.blend” with the saved group node inside.
